

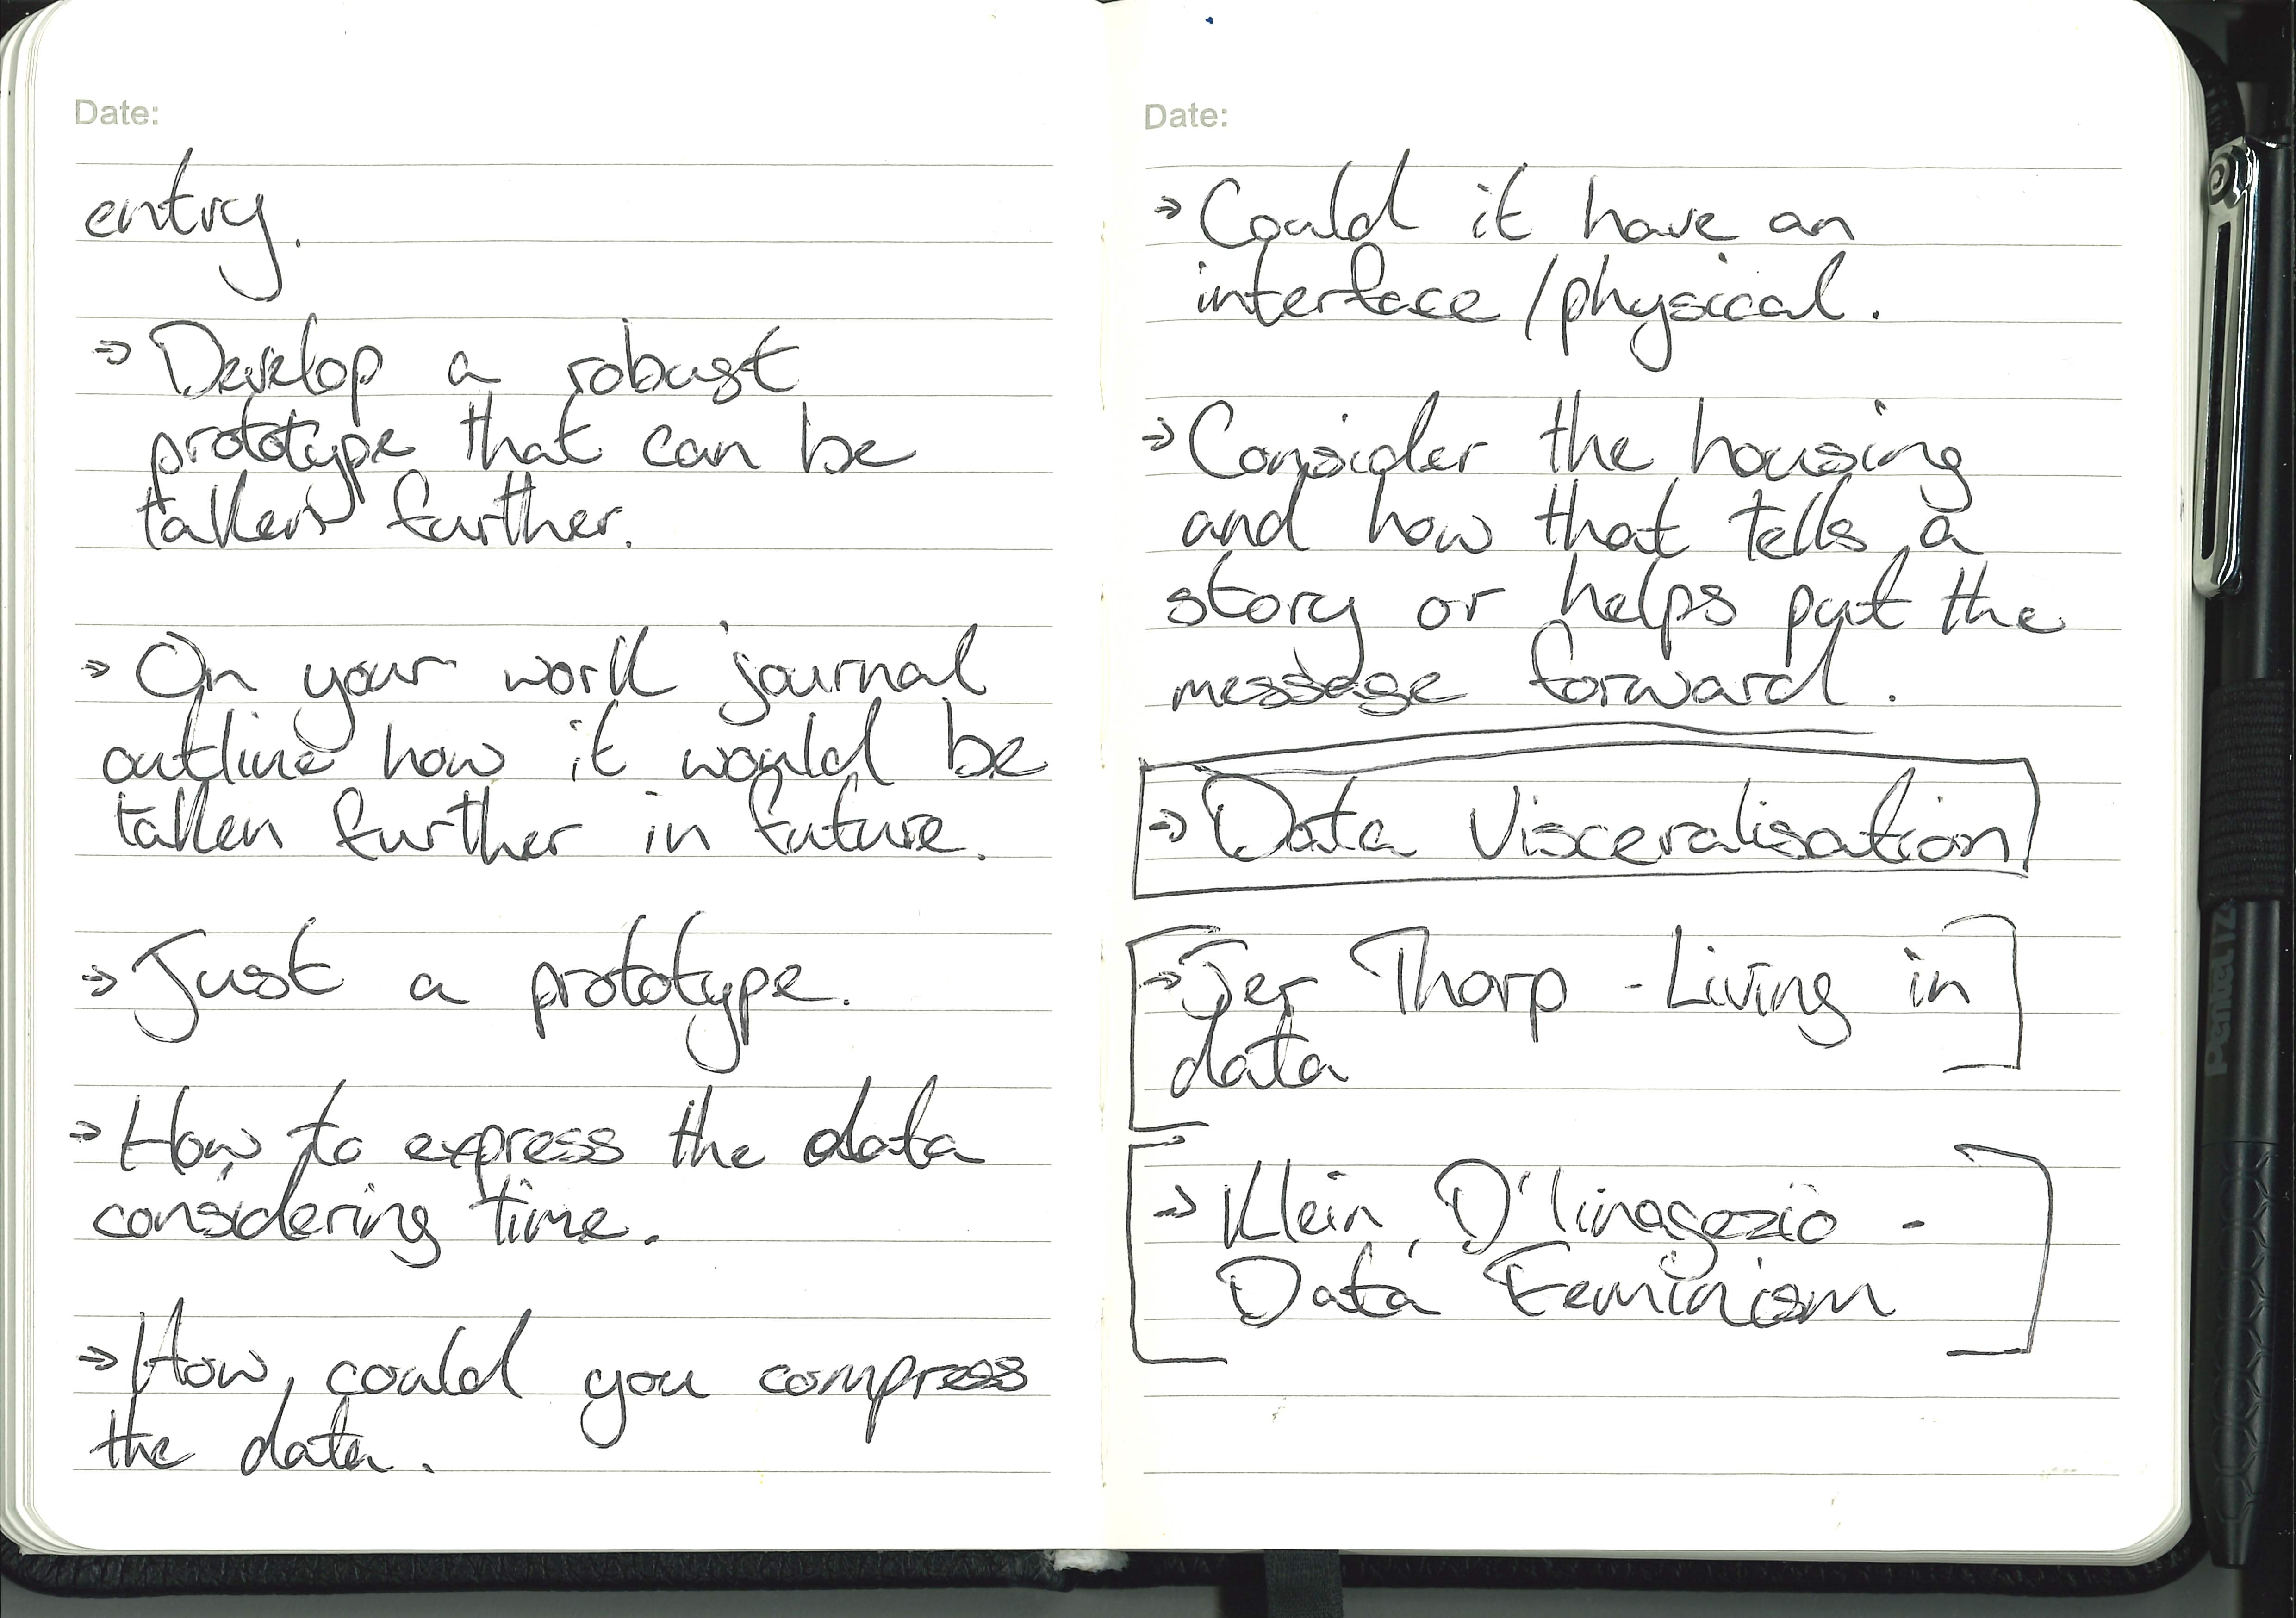
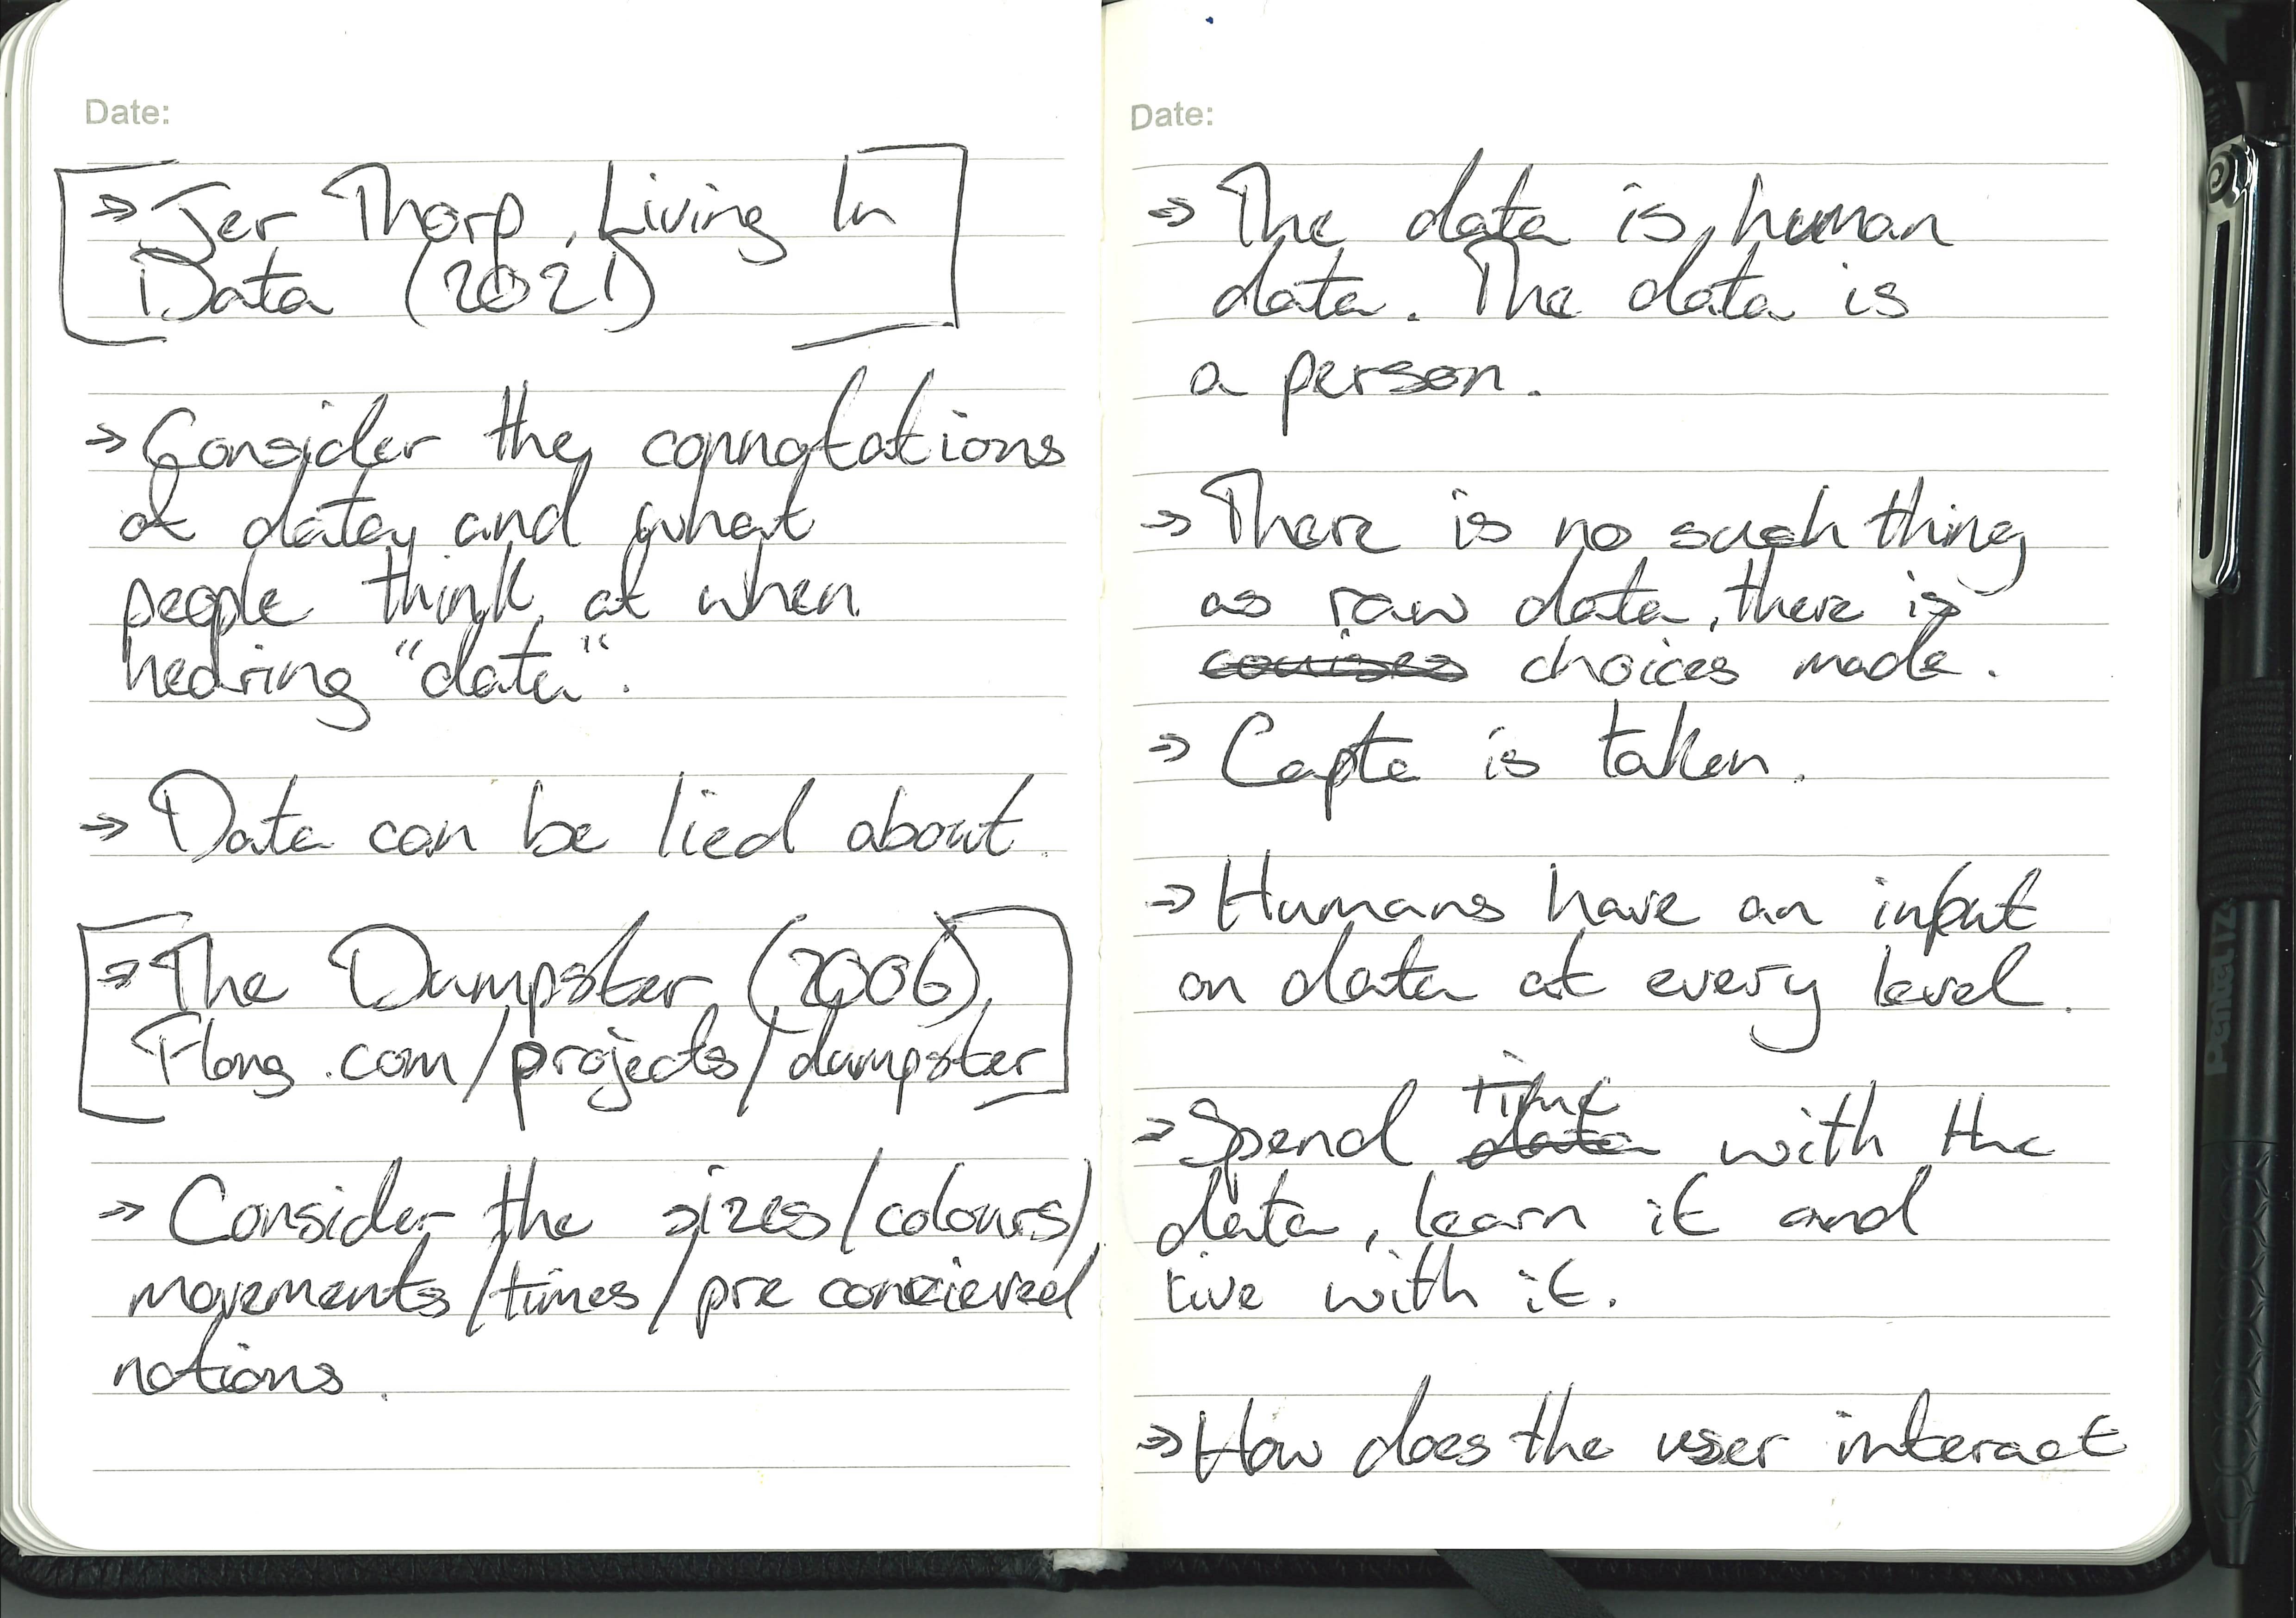
Data Visceralisation
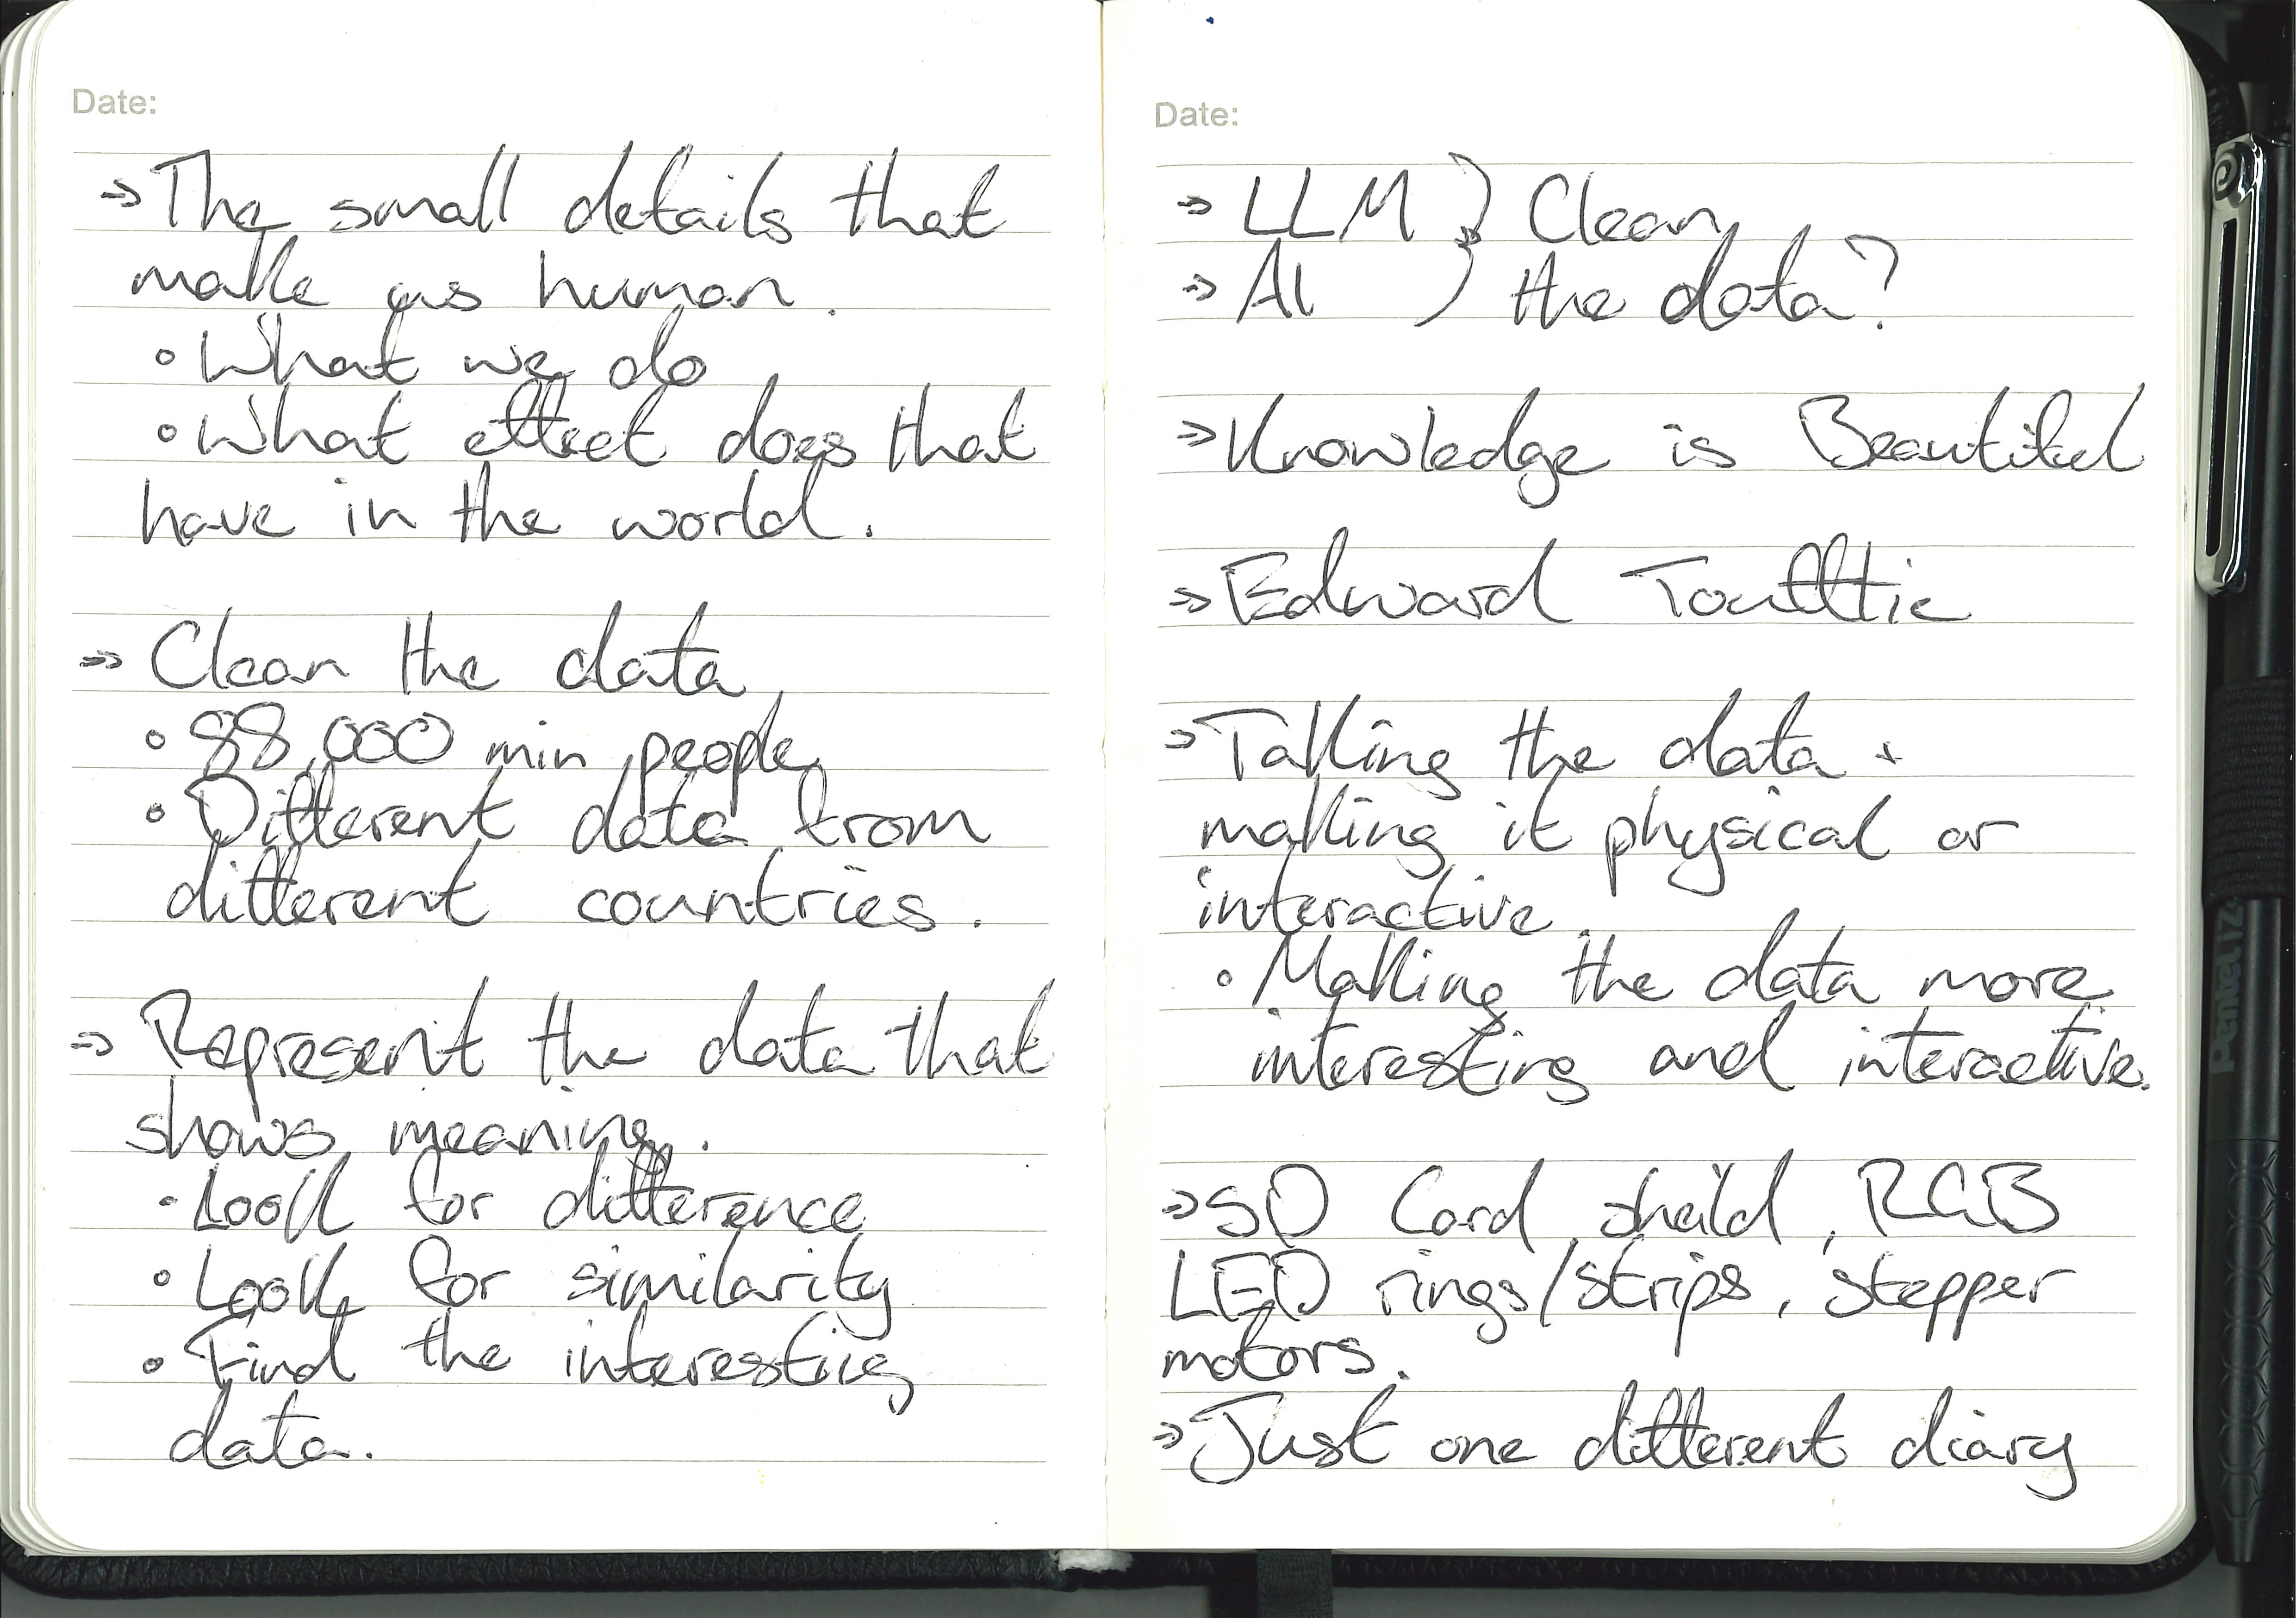
We are not just visualising the data we are giving people the opportunity to use other senses to experience the data, we are giving the opportunity to connect with the data on an emotional level.
My aim is to make one person connect with another person they have and will never meet through data. I think this is an important thought to have throughout this project. In its simpliest form it is about helping people connect.
The Data :
For this project we will be using data given to us from LABDA and focusing on one entry to drive the arduino.
Launch Notes :
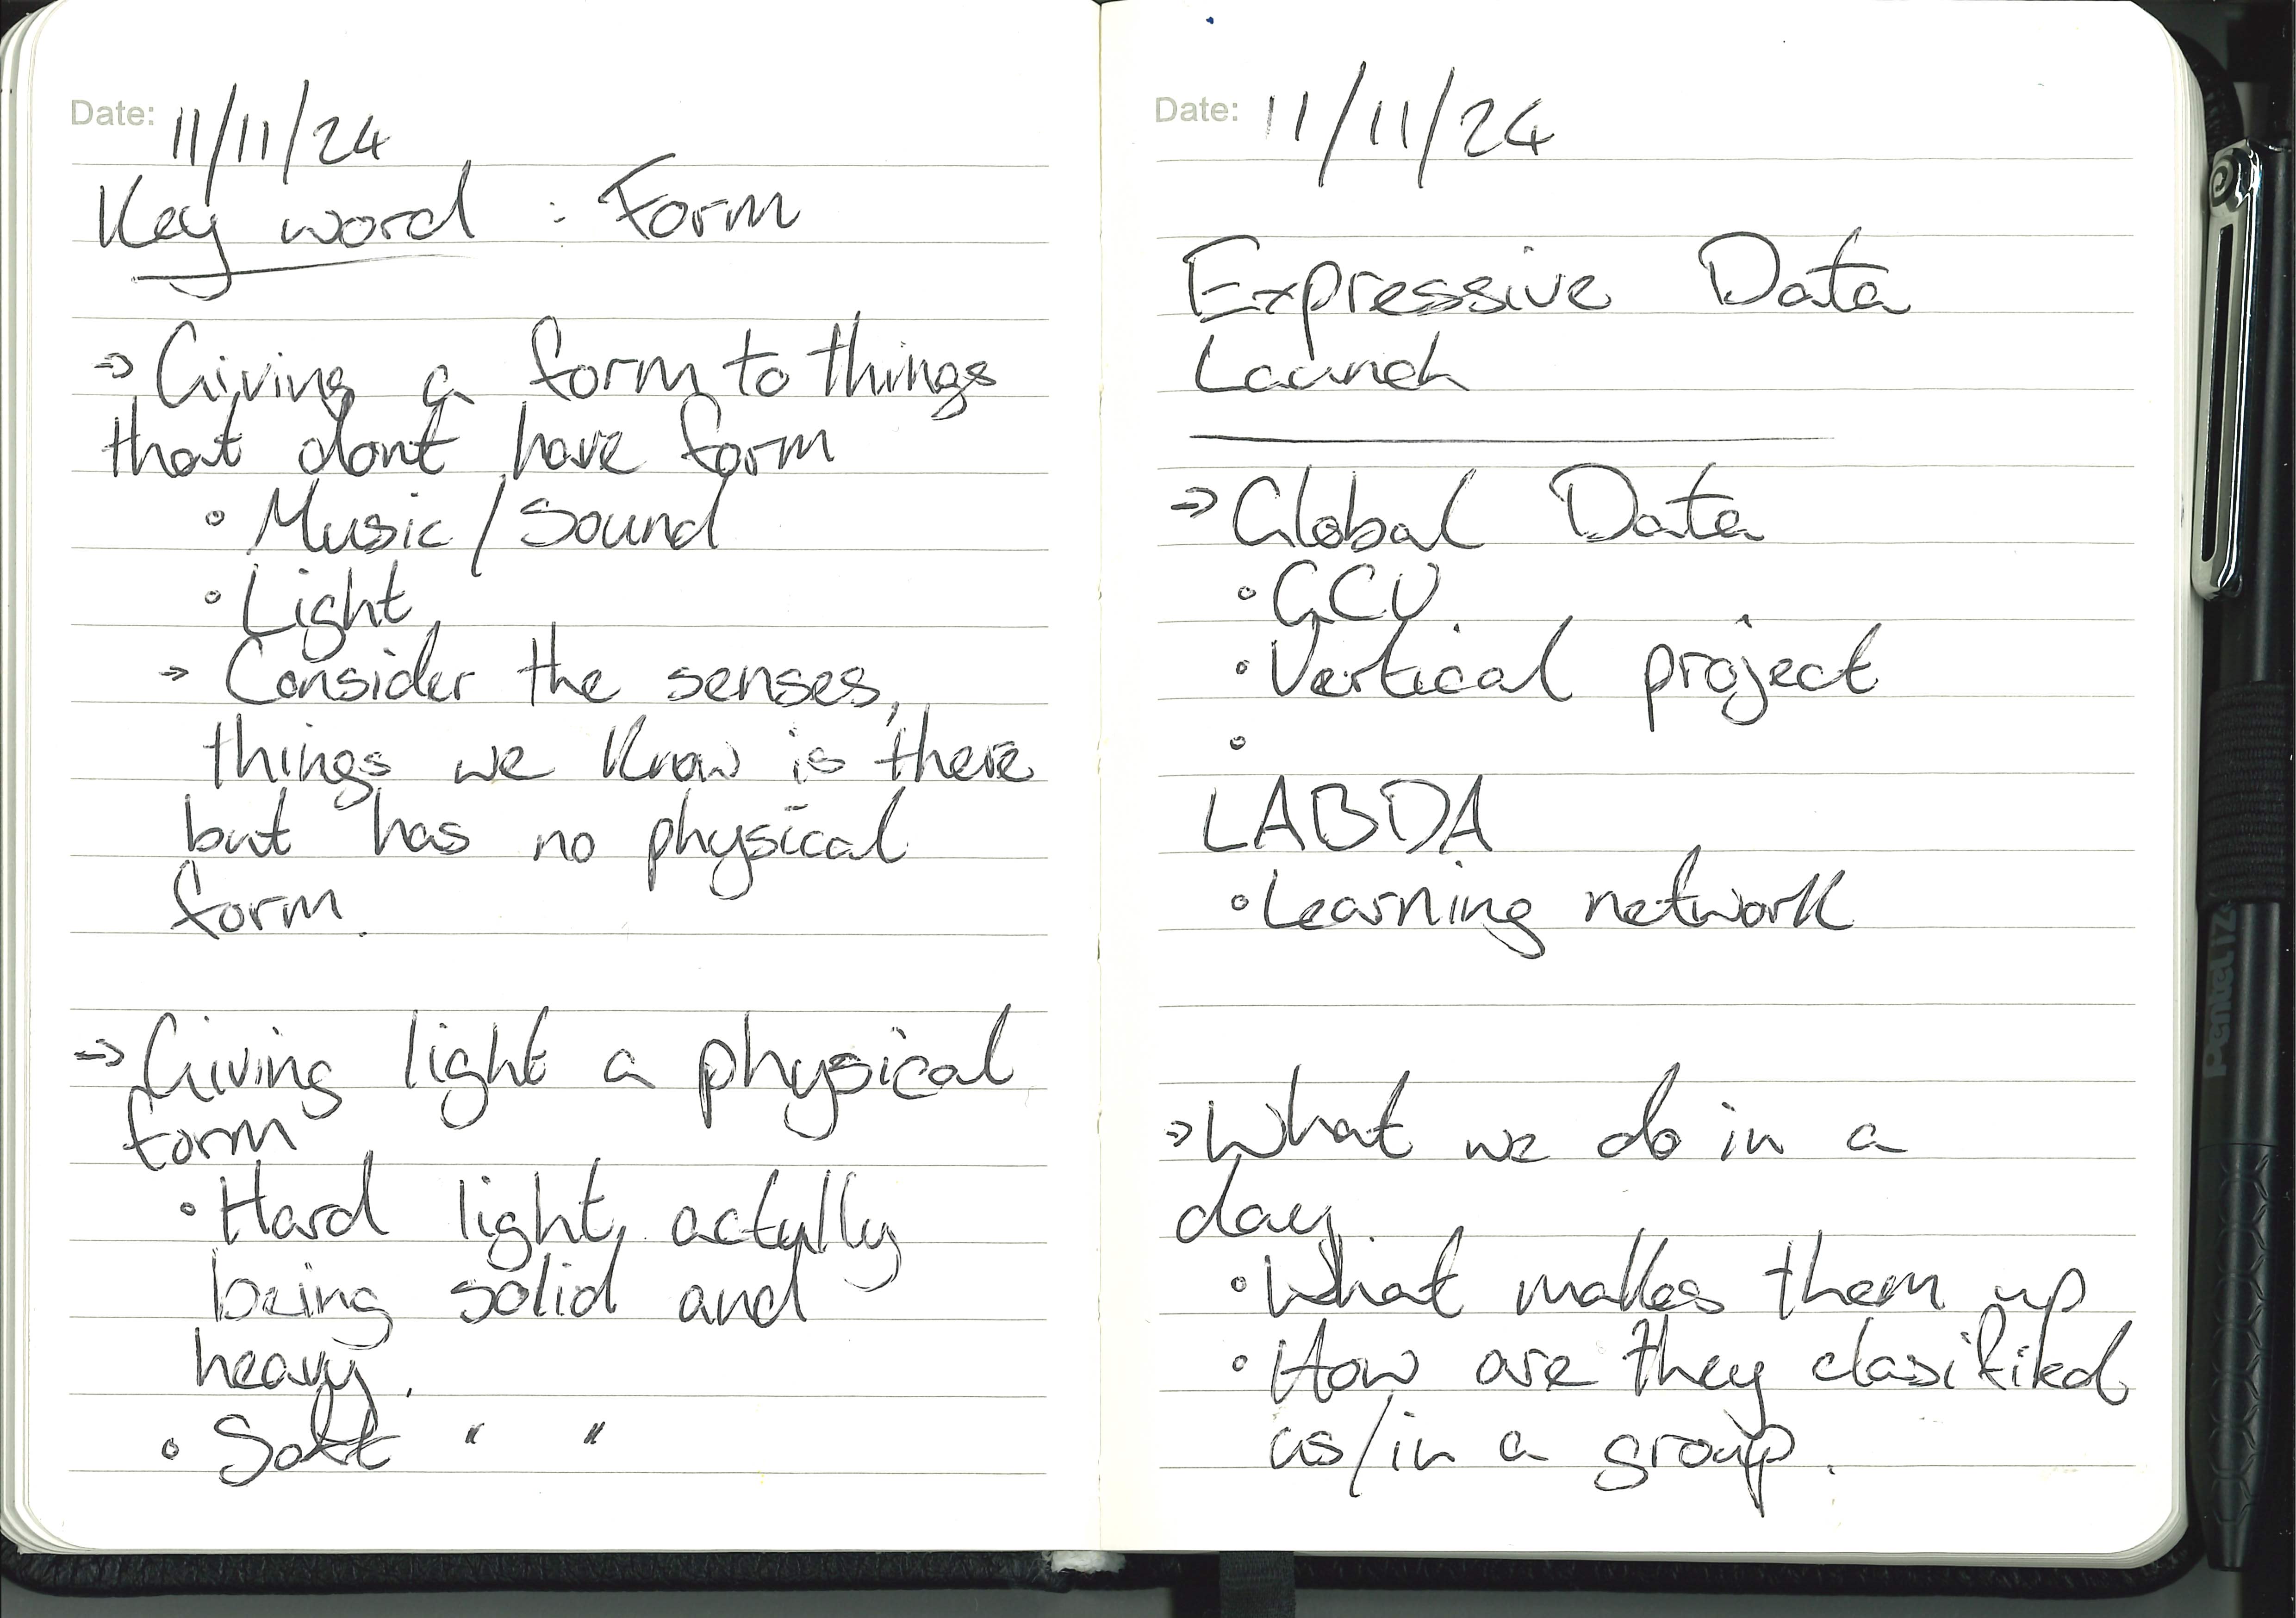

Workshops :
Through the workshops I loved that is such joy and power in the simpliest of things. Simple movements and lights can draw people in or excite people, so by elevating these very simple movements and lights driven by data then I think/hope that they will still draw people in and excite them.
Inspiration :
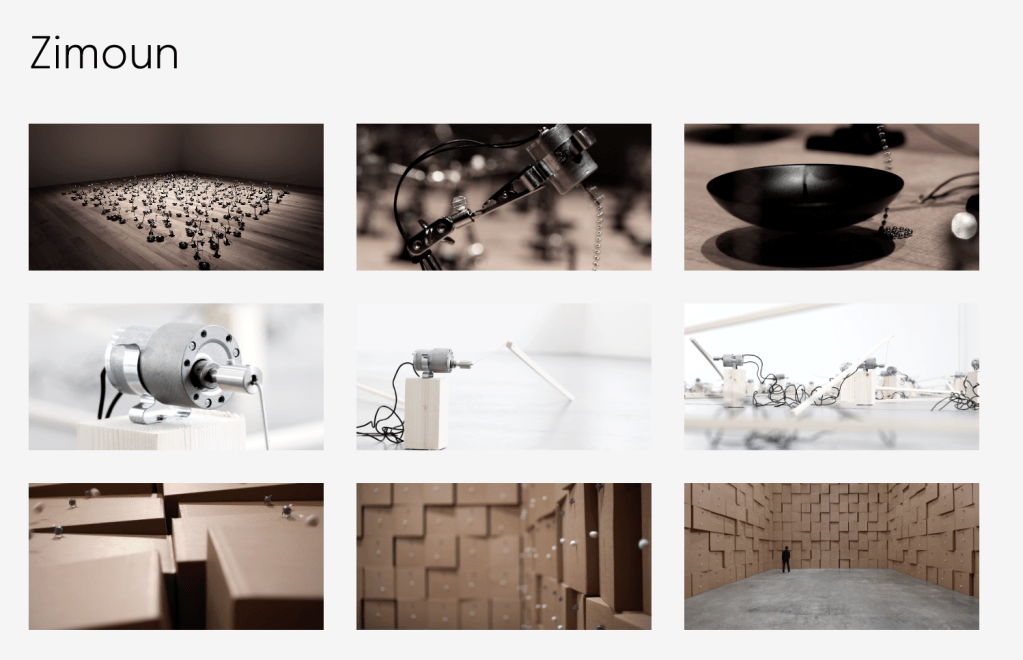


One thing that first came to mind when during the second half of the launch was the work of Zimoun that I looked into last year for my spacial audio and how they use multiple small very simple parts in a large scale to create an all encompassing experience.
I’d like to use this method with my data visualisation. One small simple sculptural piece that could be taken further into a huge represenation of the data.
Initial sketches :
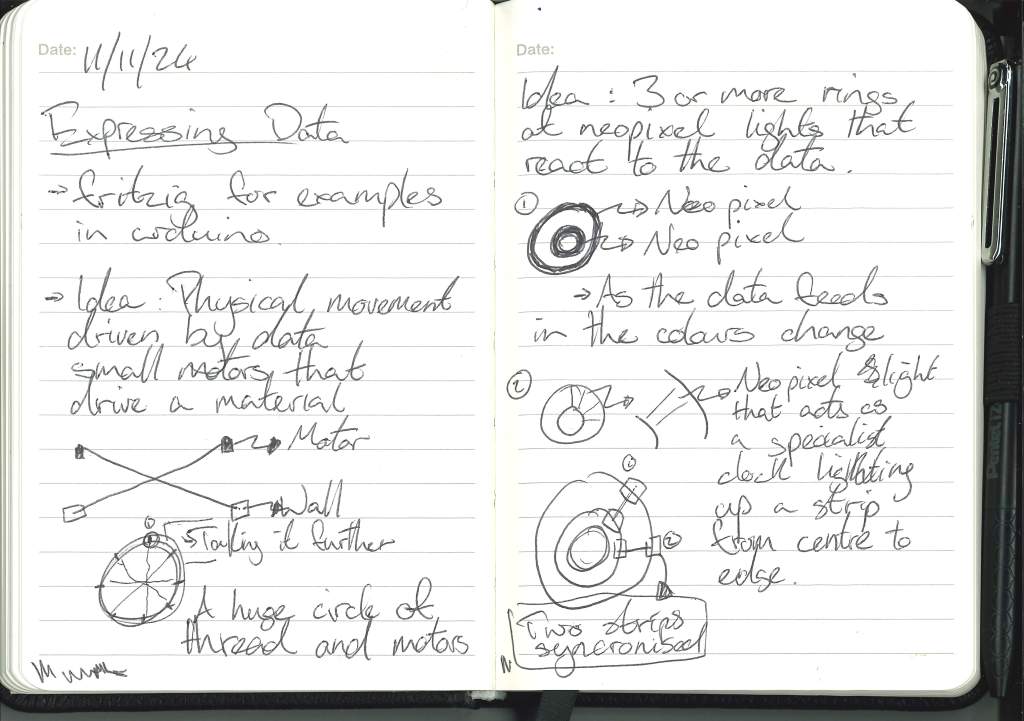
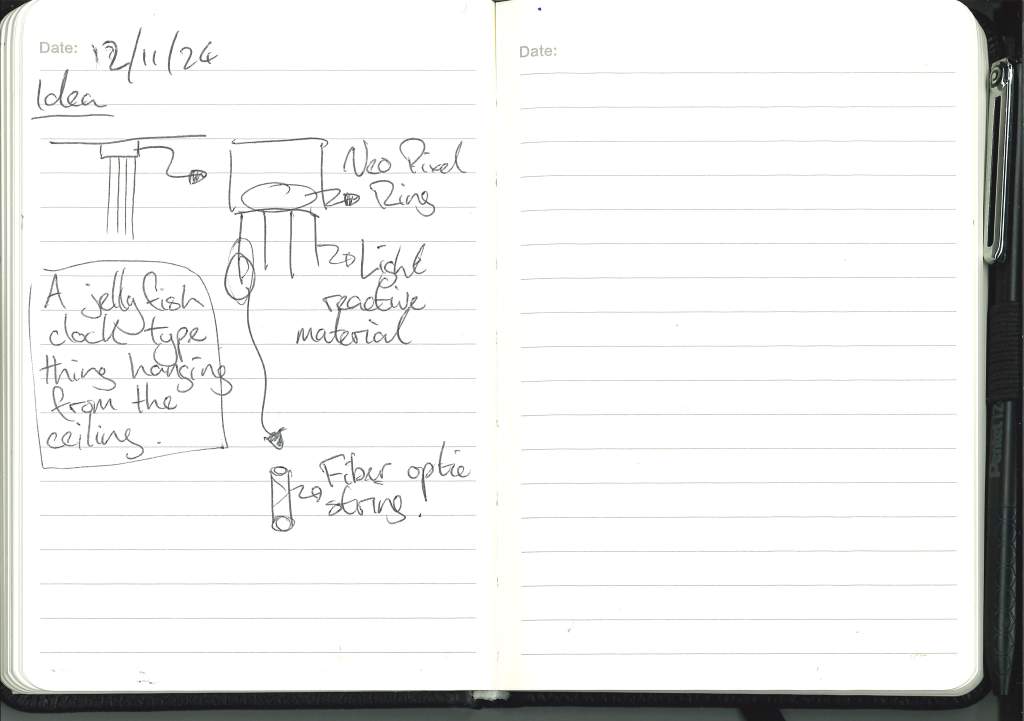
Building on the idea :


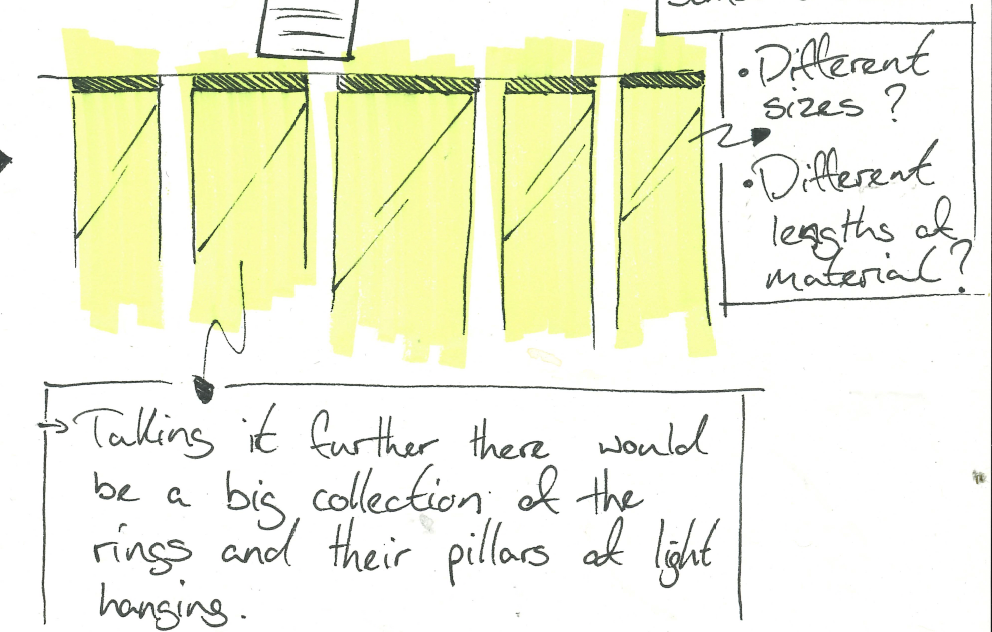
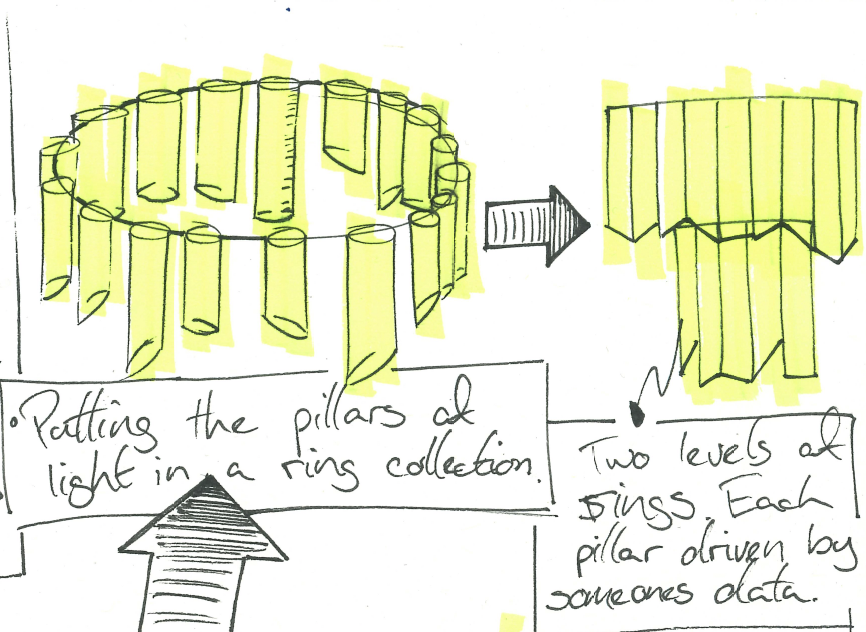
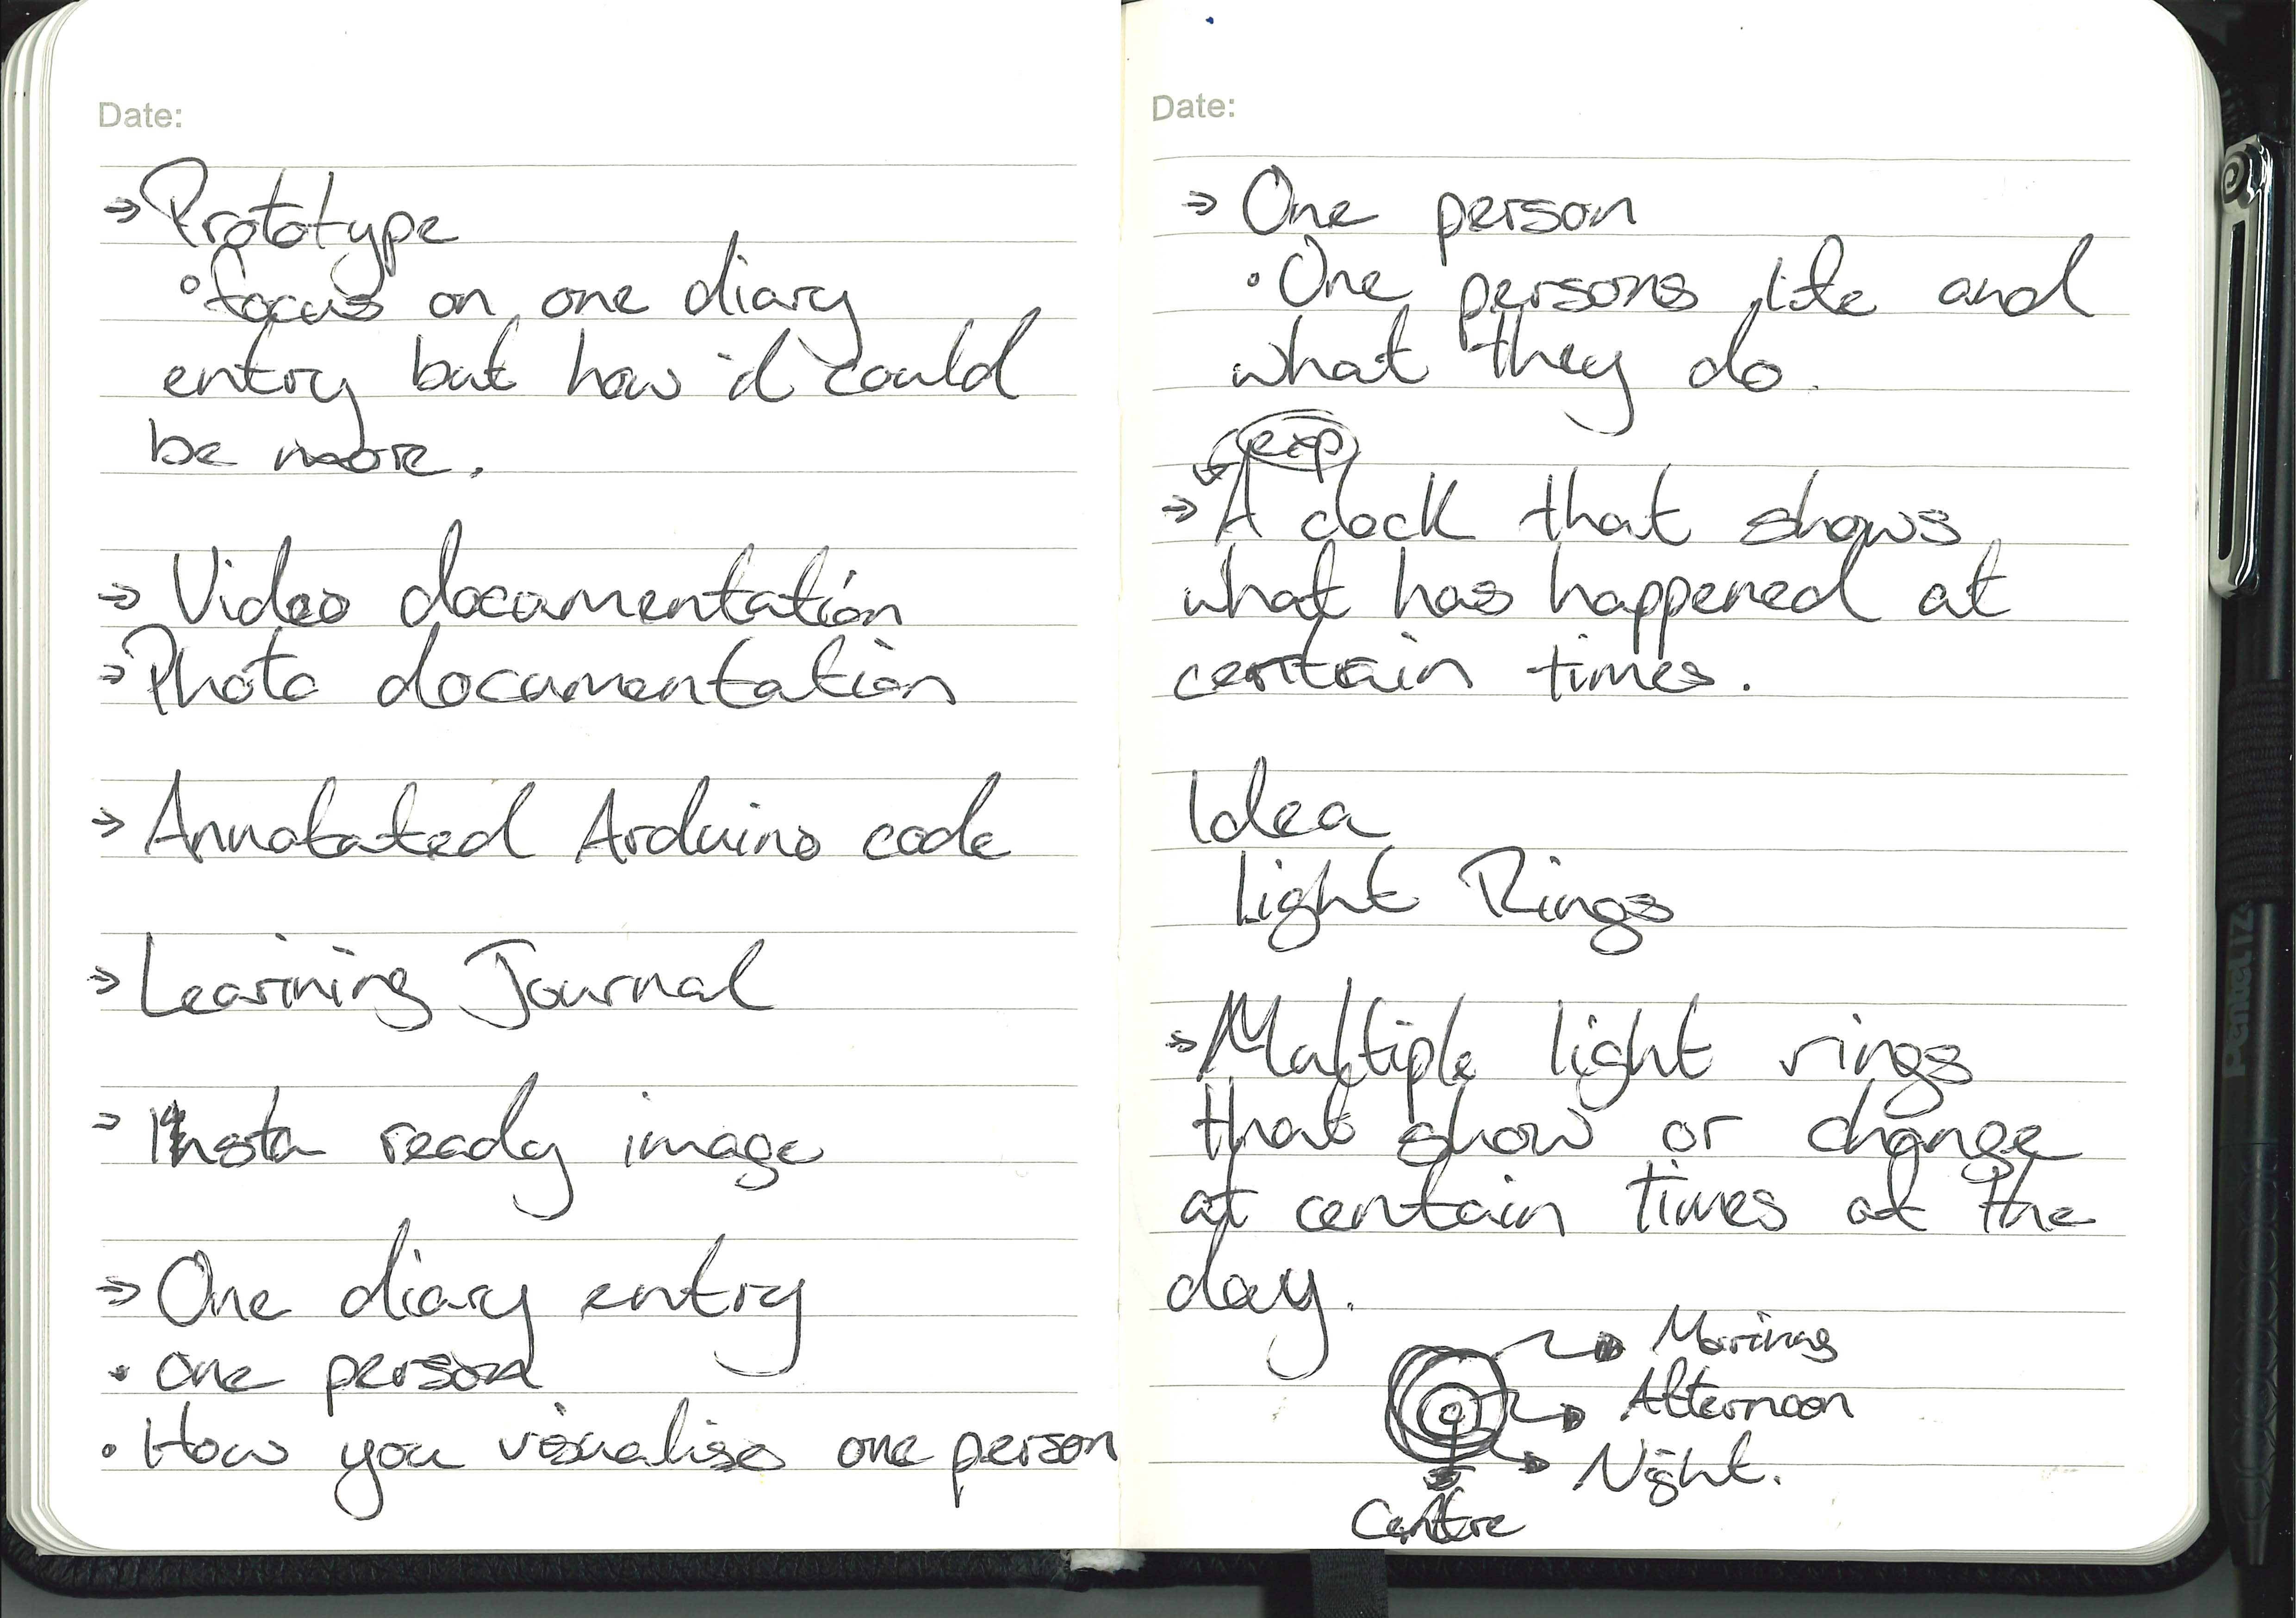
Taking the idea of the ring light idea further, I envisioned the singular pillar of light being part of a bigger chandelier or hanging pillars of light, each illuminated with a neo pixel ring that is driven by the data of one persons life in a day.
If they do something at 6am then at the corrisponding light on the ring with shine down through the pillar.
The 12 lights of the neo pixel are corresponding to the hours on a clock face AM and PM respectively.
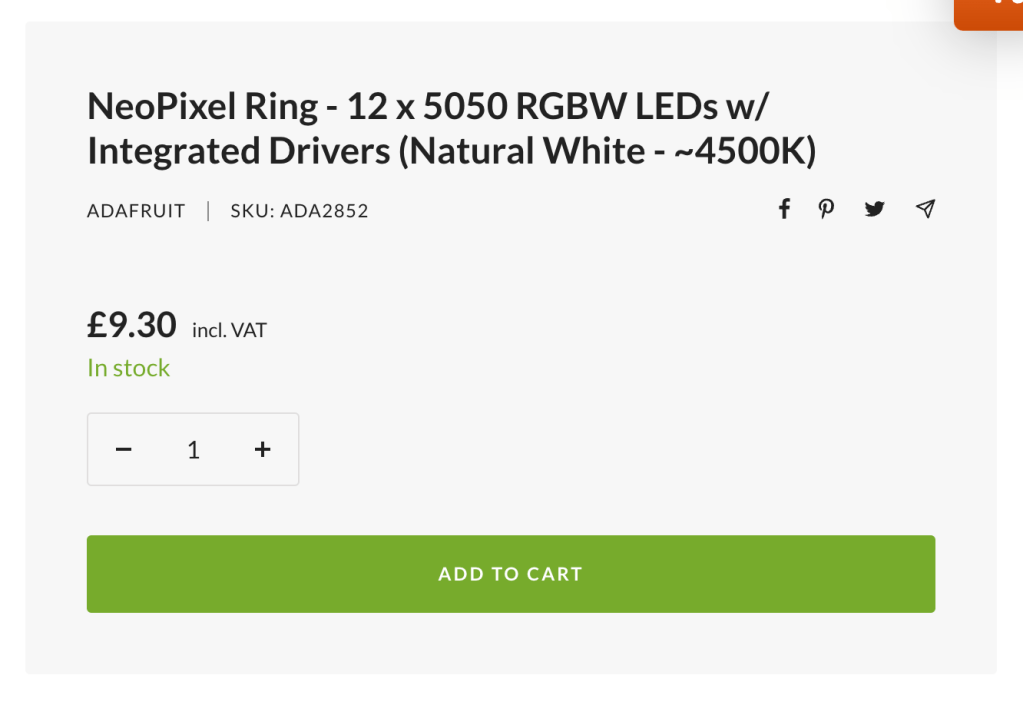
Components :

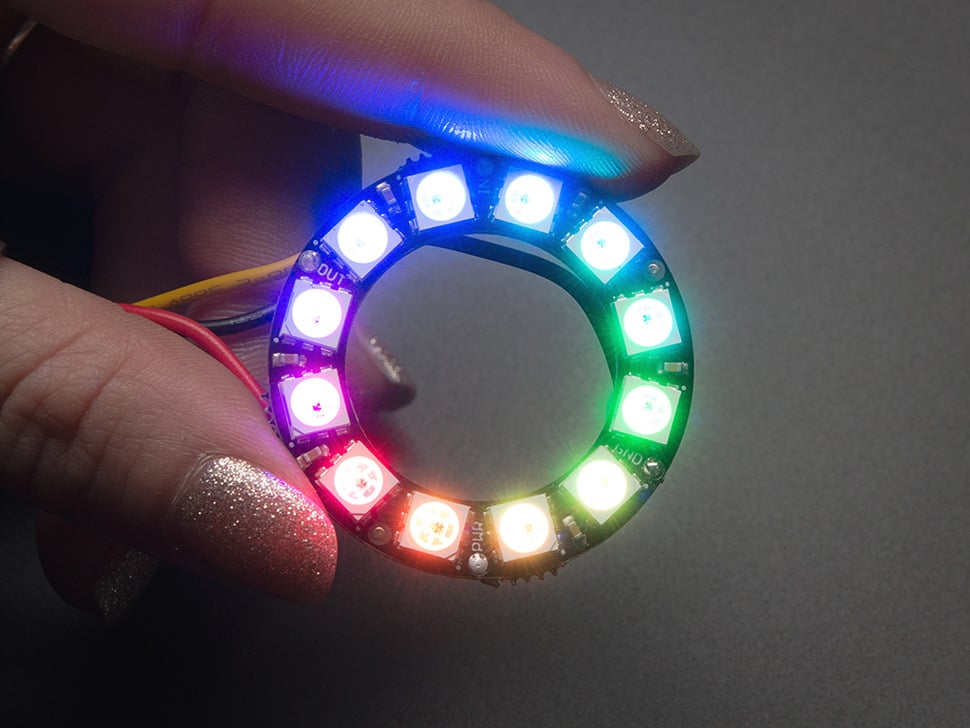
https://www.adafruit.com/product/1643
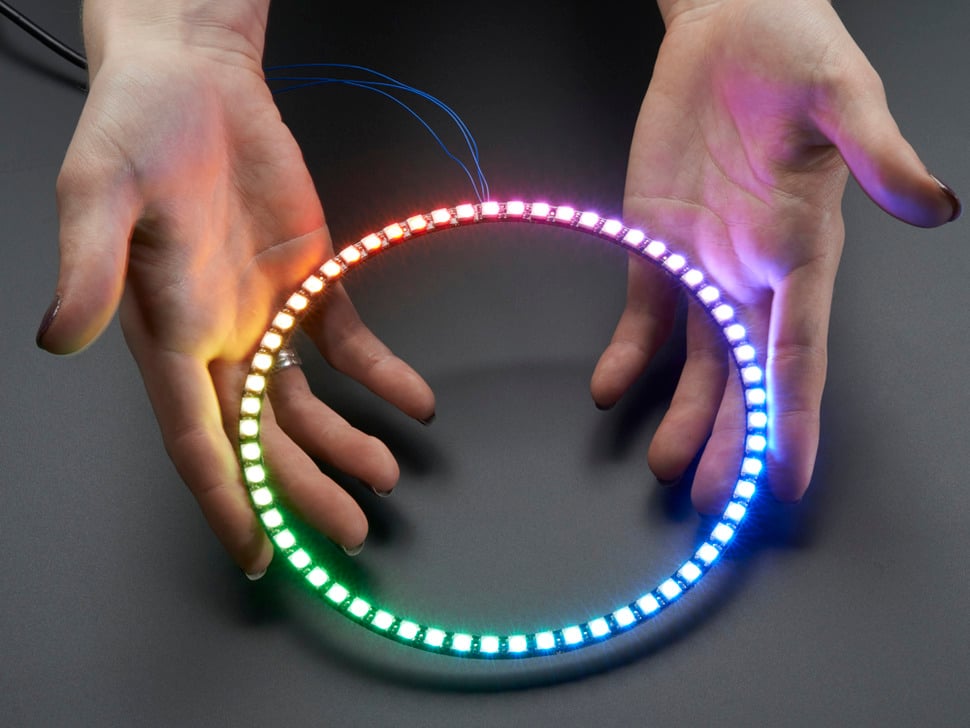
https://www.adafruit.com/product/1586
https://www.adafruit.com/product/1768
I think for what I’m trying to do the smaller rings would be ideal and would mean that when put into the chandelier I could do multiple rings without taking up too much space.
I still need a translucent material:
- greeseproof paper
- heavy tracing paper
- clouded perspect
Chat with Cat:
When discussing my idea with her Cat came up with a great idea of taking it even further.
Usmans research is taking data from people around the world so why doesnt each country have its own chandelier displaying its own data. Each country hanging next to each other showing the relationship of its own information pillars as well its relationship to eachother.
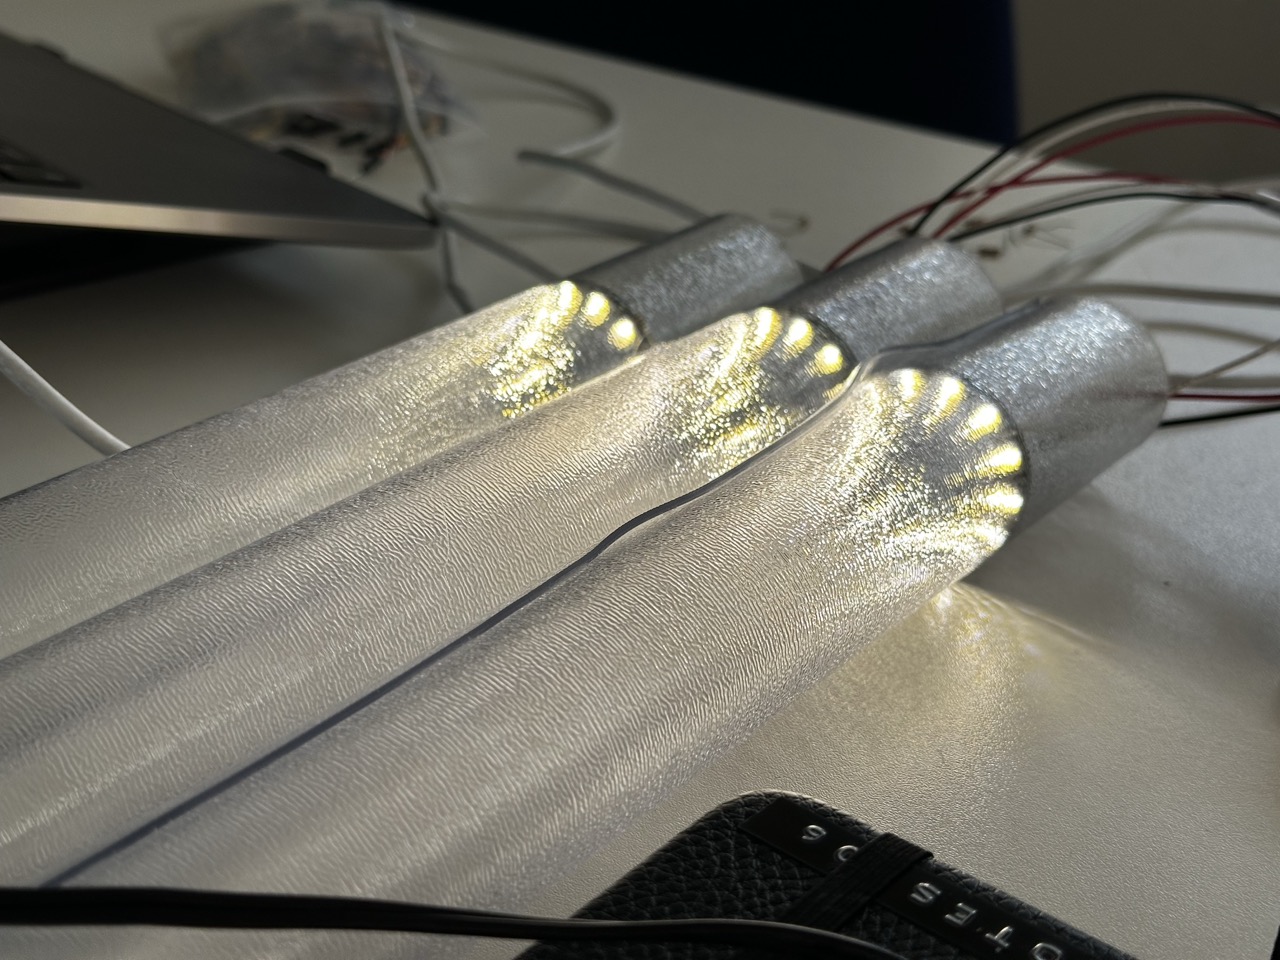
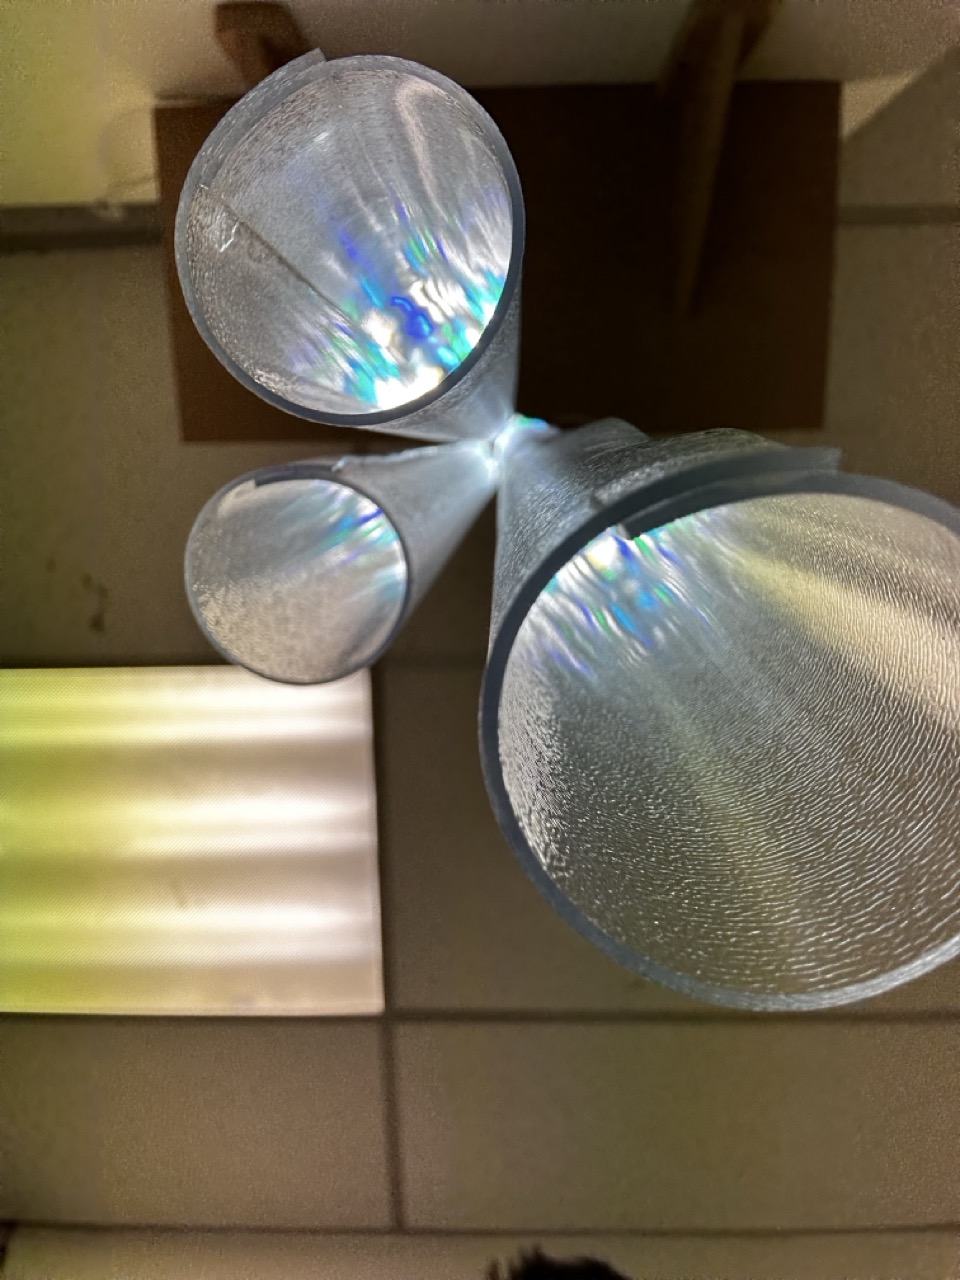
Testing the materials :
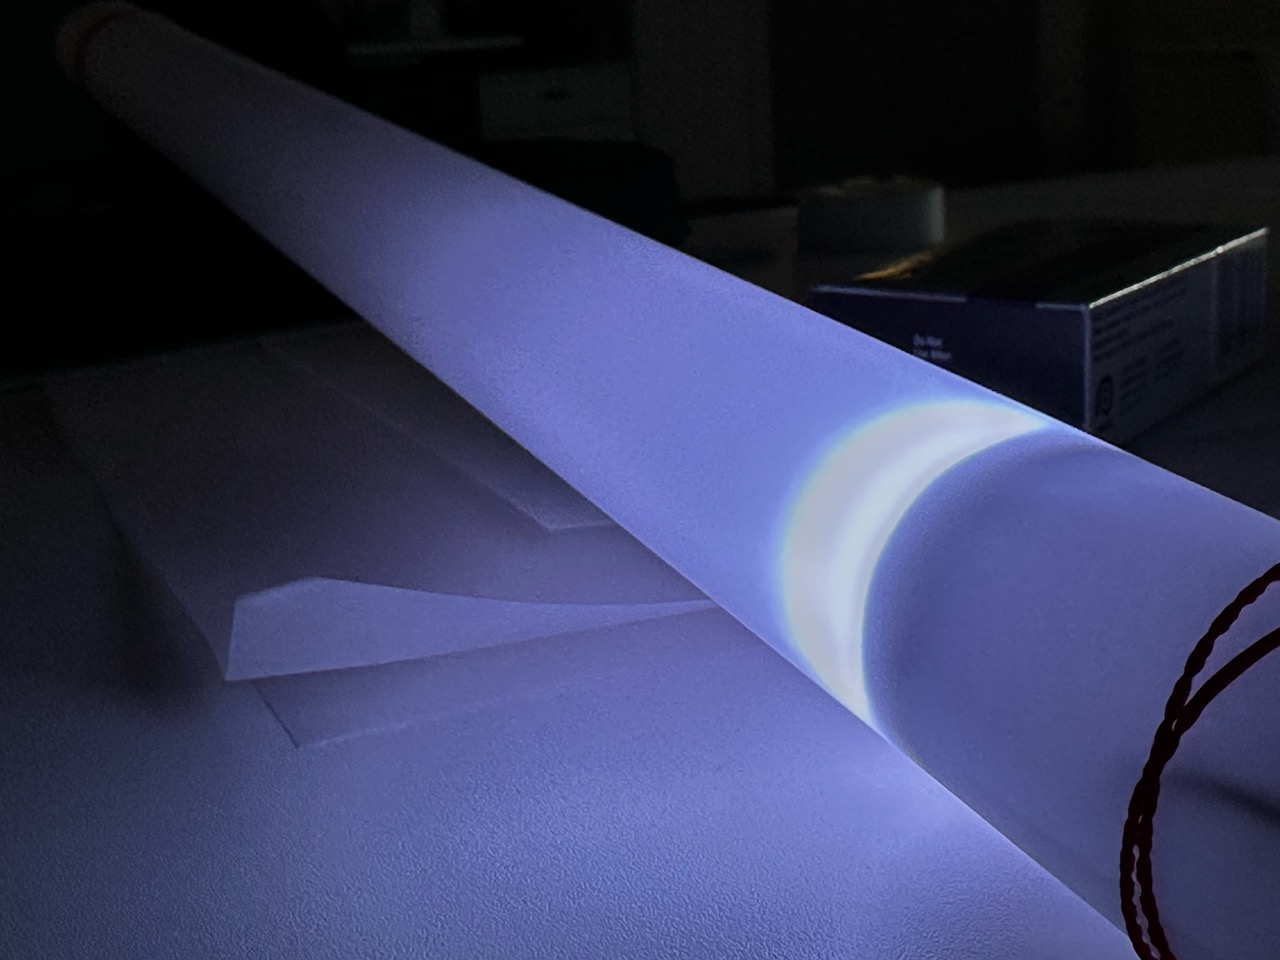
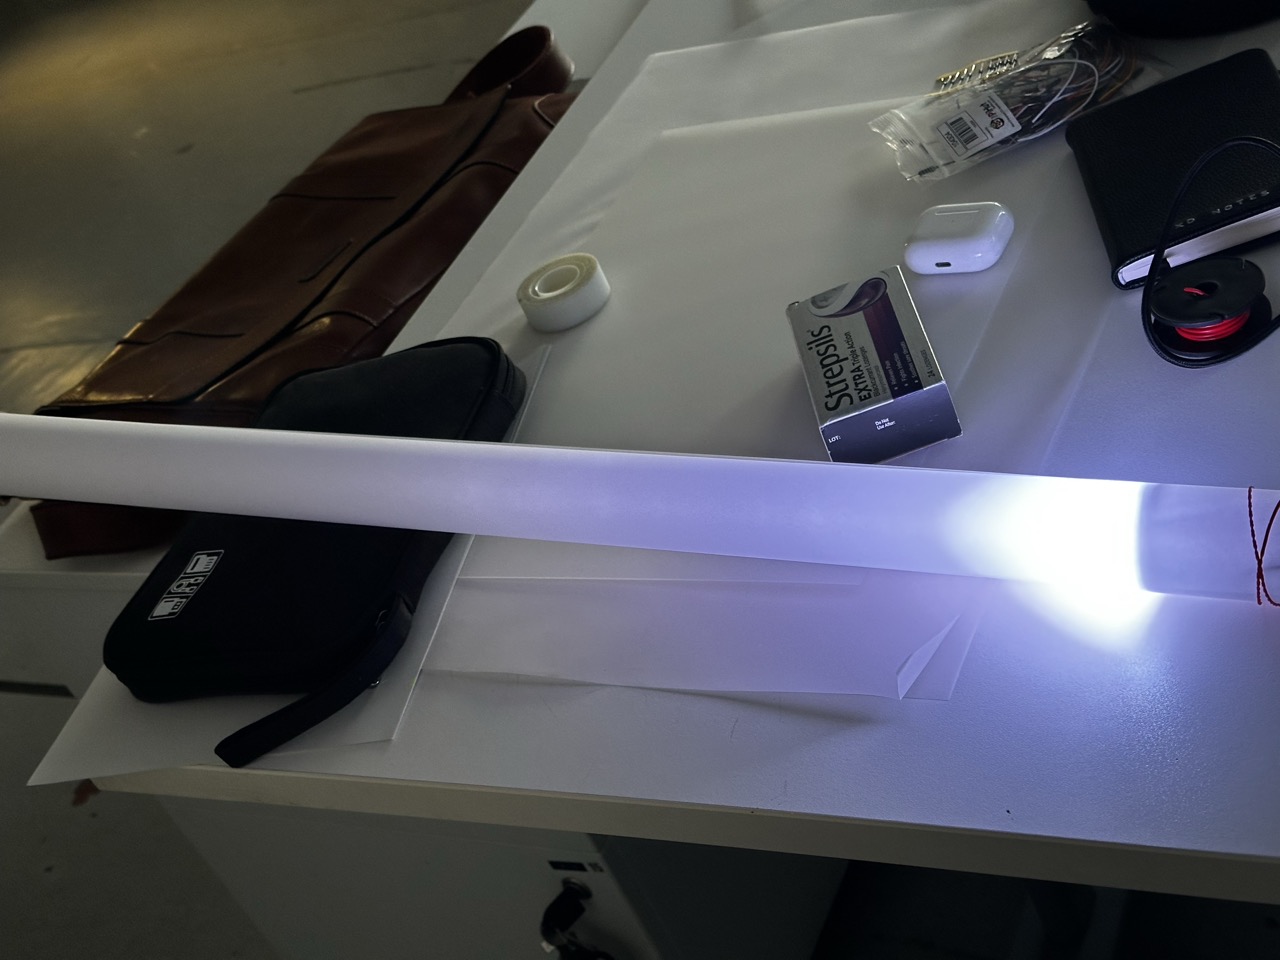

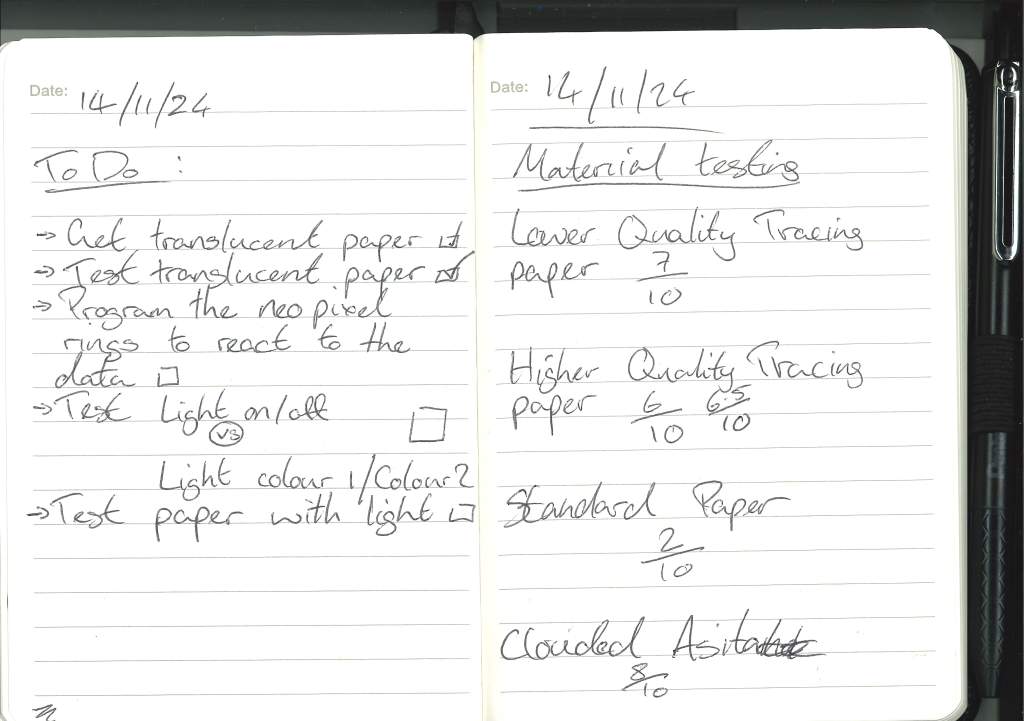
After getting multiple samples of material I simply tested them out with elastic bands and the neo pixel to see how far the light would travel down it, the main effect people light enough and far enough down the tube.
I will say that all i could think at this point was the neo-pixel lightsabers that you can buy.
After testing it was obvious that the acetate was the best as it doesnt weigh much, its robust enough but carries the light further down the tube along with a cool white effect to the light.
At this point it was just using the “diary” sample csv file on the Arduino code so I’m confident that with all off the lights on the light will travel further.
On the topic of how to display the infromation through the neo pixel I still have to test two different ideas I’ve had :
- All the neo pixel ring illumiated within the tube and then one light changing colour at a time to indicate at what time the data was documented.
- All the neo pixel ring illumiated within the tube and then one light changing colour and staying that colour so that throughout a 24 hour period the colour of the tube changes as the more activities are documented.
- Only one light is illumiated at any one time and when the data is not shown the light is not turned on.
- At the start of the day none of the lights are on but as the activities are logged each tube gets lighter and lighter until it resets.
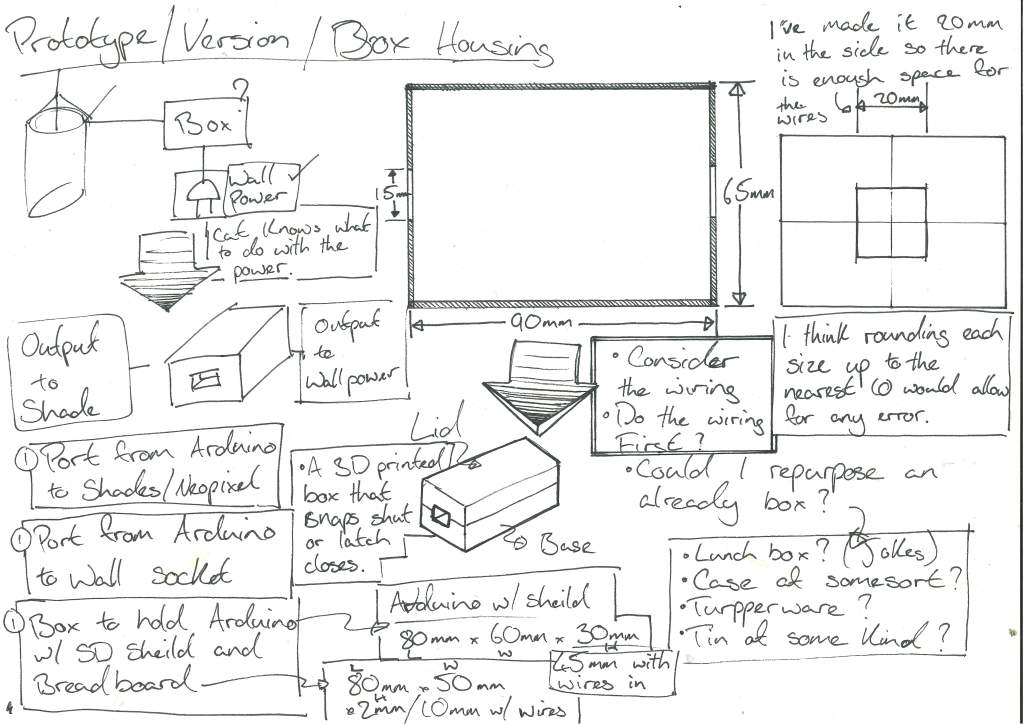
Designing the prototype :

Ordering more components :

In future projects I’ll plan out all the components I need for the project and order them in one as ive spent like £9 on delivery from PiHut.
The CSV file :
On Thursday, my alarm rang at 8:30 am, but I snoozed until around 9 am. Then I got up and set the breakfast table for me and my partner, and had yogurt with fruits, cereal and almond butter for breakfast. I got dressed, put on some skin care and make up and was ready to leave by 10 am. I took a bus with my partner to the university campus and got to my office at 10:30 am. Between 10:30 am and 12 pm, I replied to some emails, had a call with a senior colleague, and worked on a grant application. At 12:15 pm I headed to the canteen to get lunch, and ate with colleagues in the staff room. We then chatted and bought tickets to see a movie (Dune) the next day. From 2 to 3 pm I attended a seminar, then I worked on the grant application again until 5:30 pm. I took the bus back home and cooked dinner with my partner. During dinner, I video called my family in my home country. After dinner, I planned an upcoming vacation and then watched a movie until 11 pm. After the movie, I folded some laundry, washed myself, put on some skincare and went to bed. Between 11:30 pm and 12 am, I read a book and played a game on the phone with my partner. I fell sleep at 12:15 am.
After a quick investigation of the data entries, I was mainly looking at the ones written in english, I found one that had multiple time stamps over 24 hours that would show the full potential of my design concept.


As the data that I needed was in a freeform casual format I used ChatGPT to break it into manageable pieces that I needed for my CSV file.
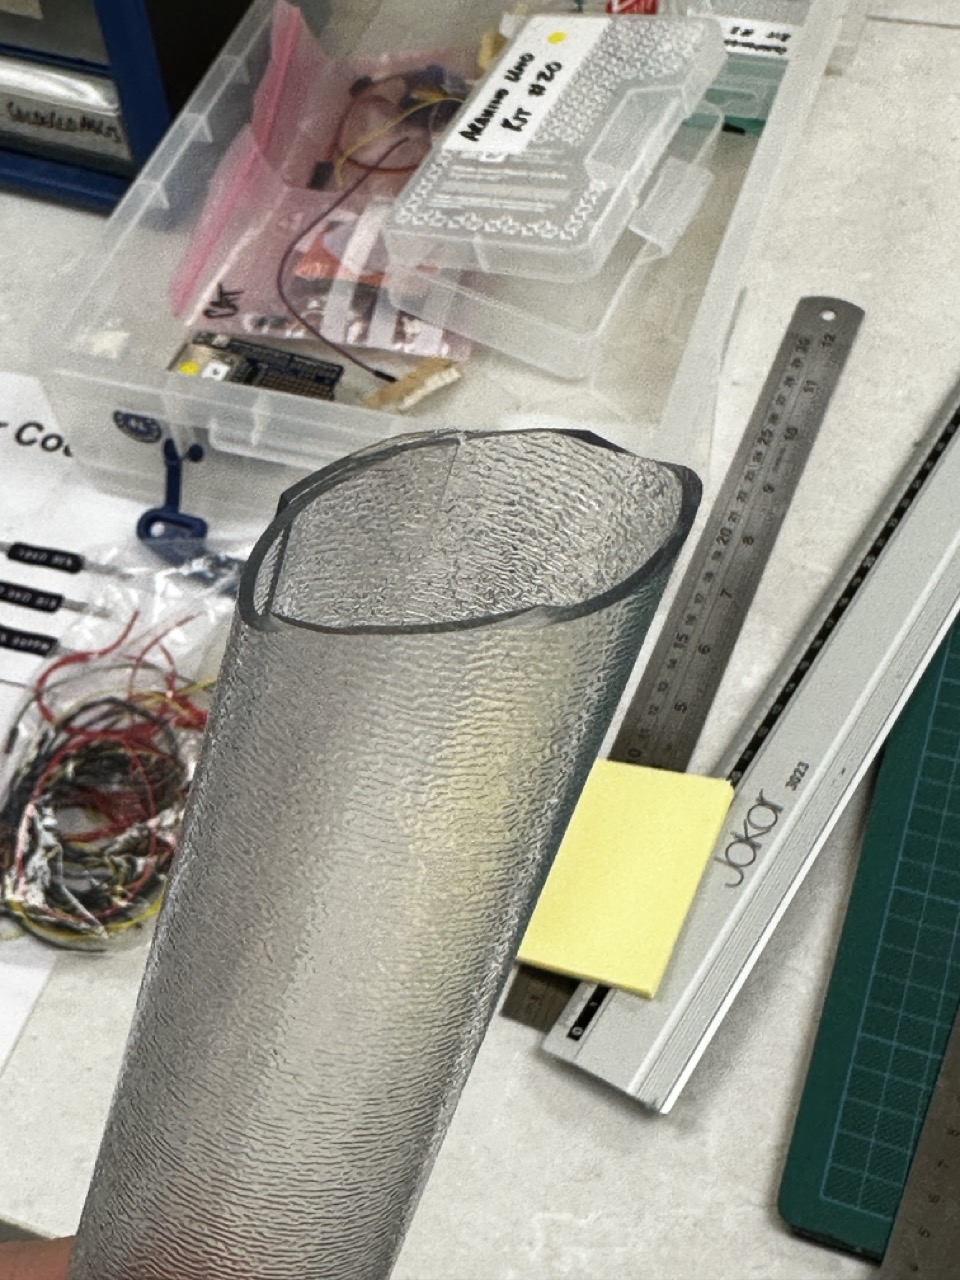
Buidling the tubes :
As I work over the weekend I was a bit limited with my choices on where to go and personally knew that I would need to get the material quickly so that I had enough time to build my prototype.
I, at the moment, work in Dunelm in Clydebank and work the weekend but during my shift I found a rubbery malleable material thats used for floor protection in the home that seemed ideal.
And a full stand of Gorilla glue in the store I also had my bonding agent.

It also helps that I get 15% off.
With the measurements I did during the concept design of the project I had a general idea of the sizes and and structure I needed.
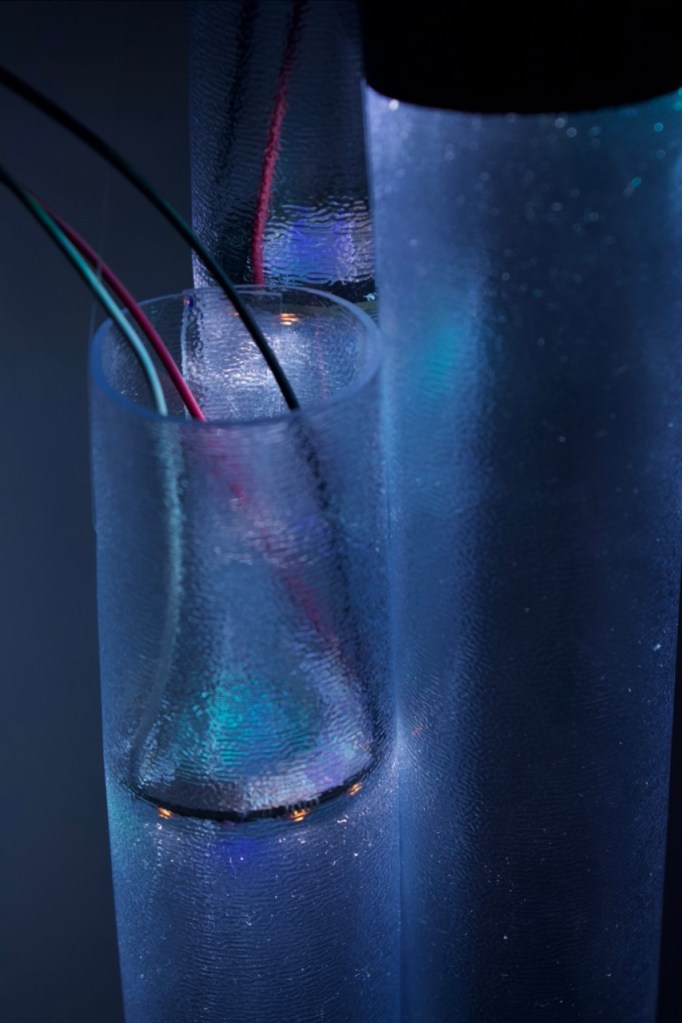
I will be honest through making the tubes, I did have a lot of times when I solved problems by stumbling into solutions; like holding the NeoPixels in place, initially I would have used fishing wire to hold them within the shade but due to its rubbery tough properties it help the rings in place securely when glued together.
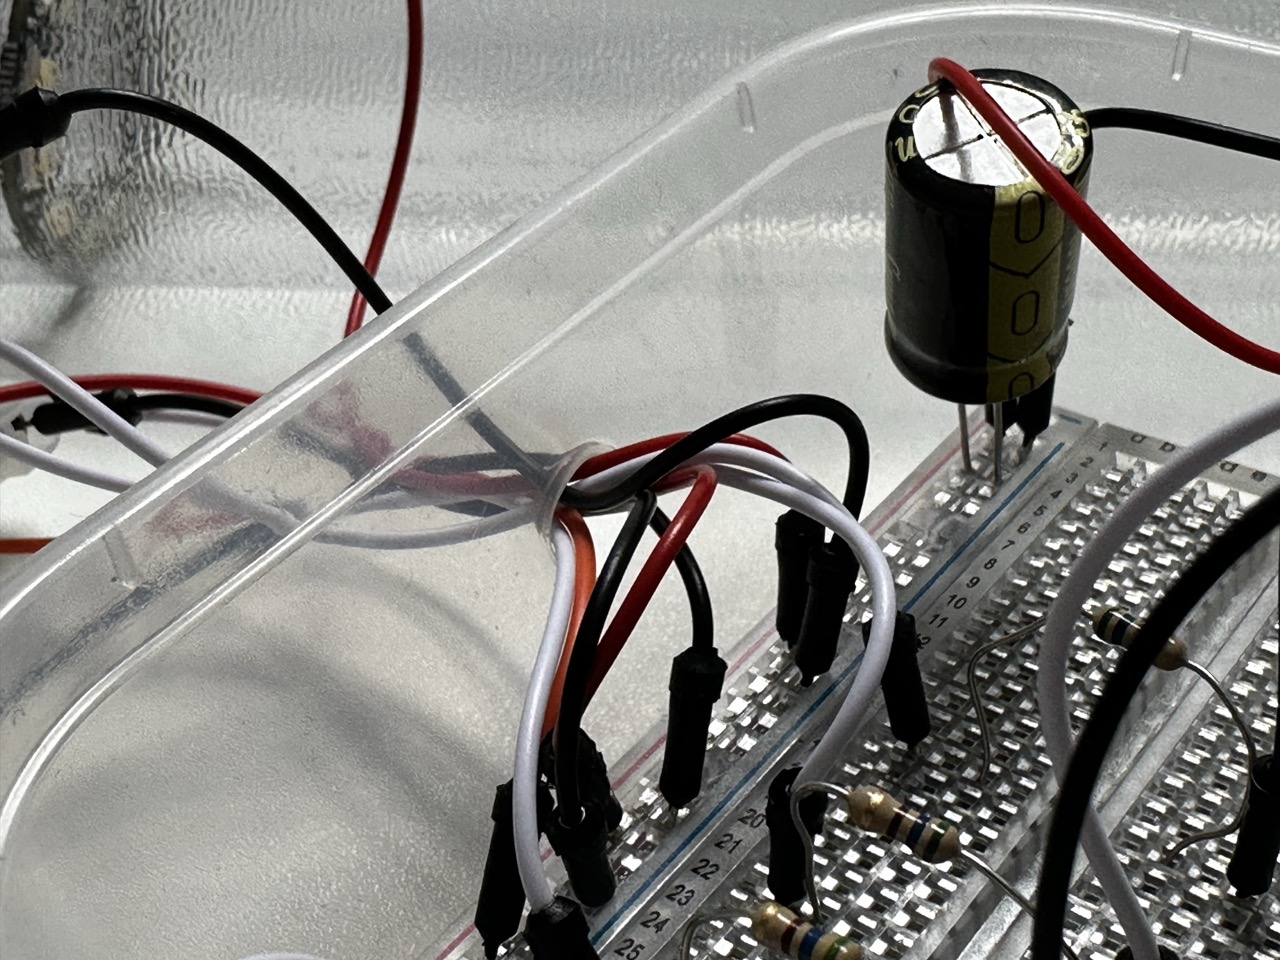
As the NeoPixels that came from PiHut didnt have any wires the needed to be soldered on and I moan about it at the time but I’m quite happy to solder components, especially when it goes well, so each NeoPixel was soldered with a higher quality stranded wire and attatched terminals at the ends for prototyping purposes.
As well as the NeoPixels needing soldered I had the Adafruit SD card reader sheild to solder as well, so it was a two birds one stone sort of thing, which then frees up the SD sheild that I borrowed.
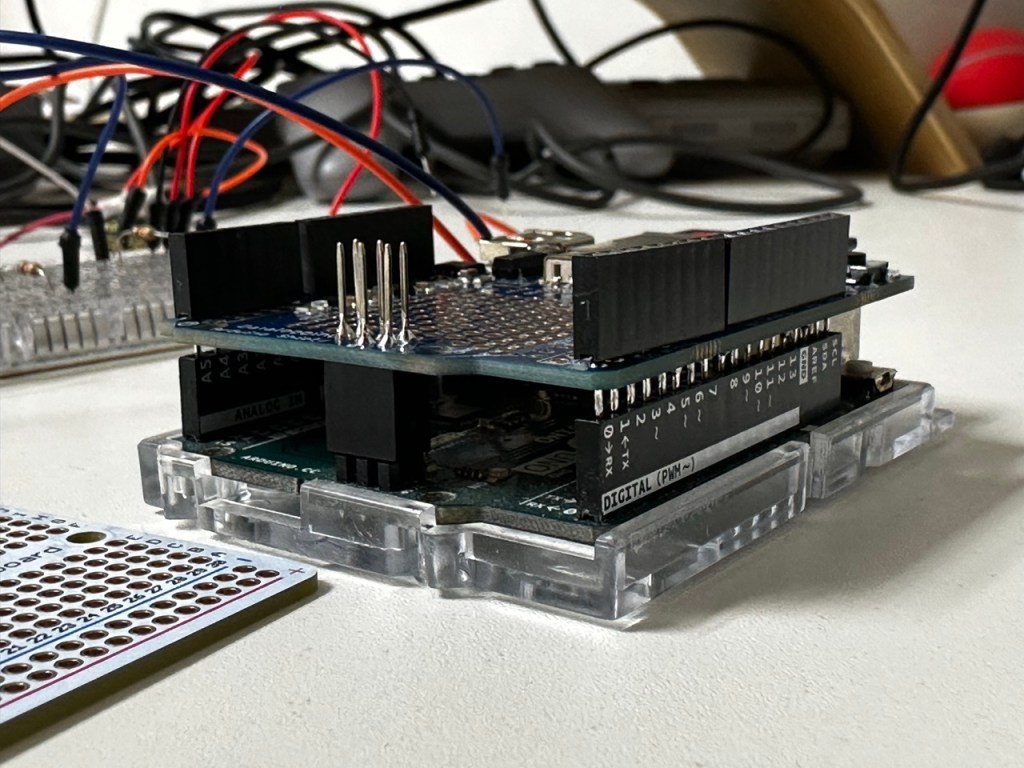
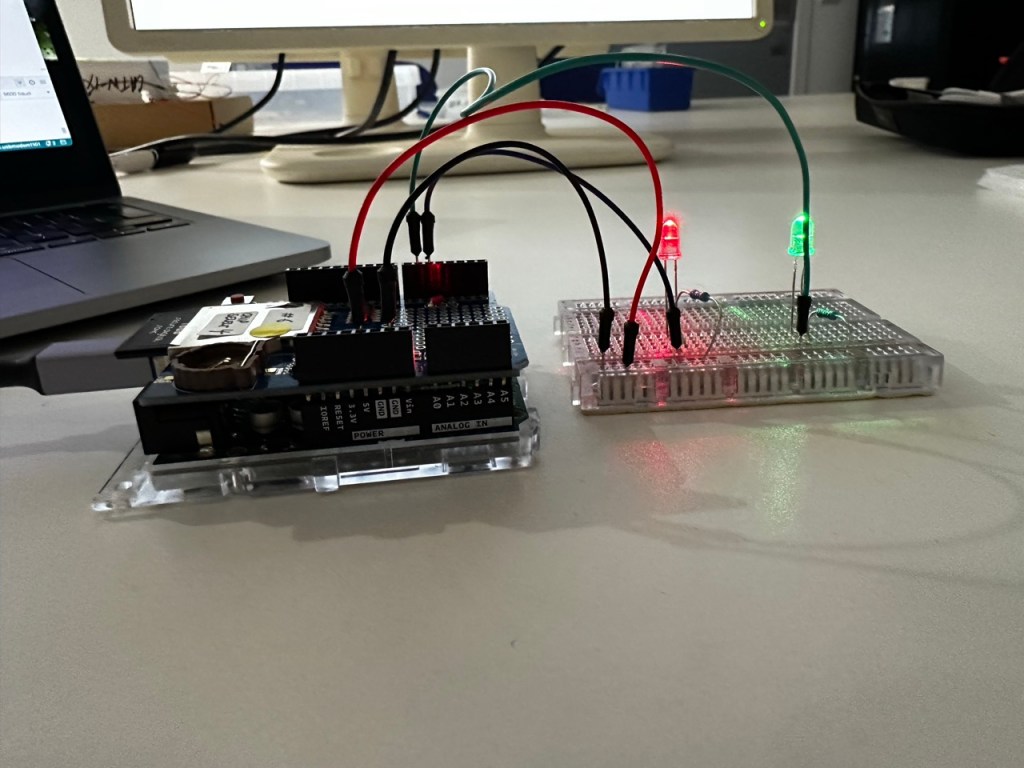
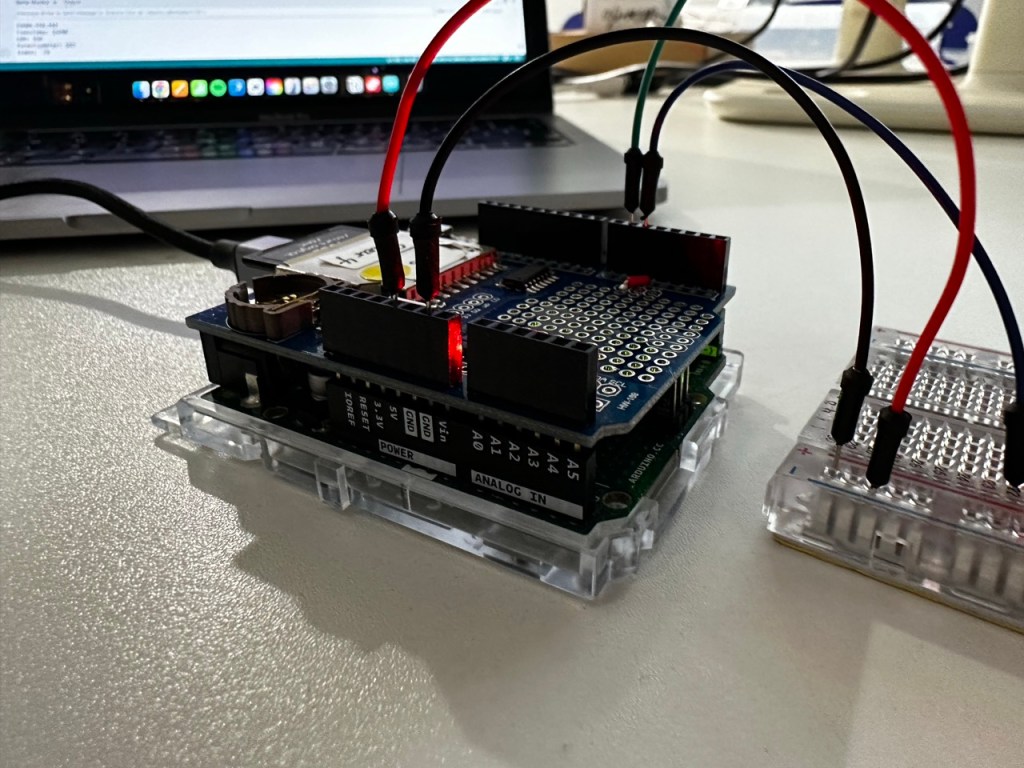
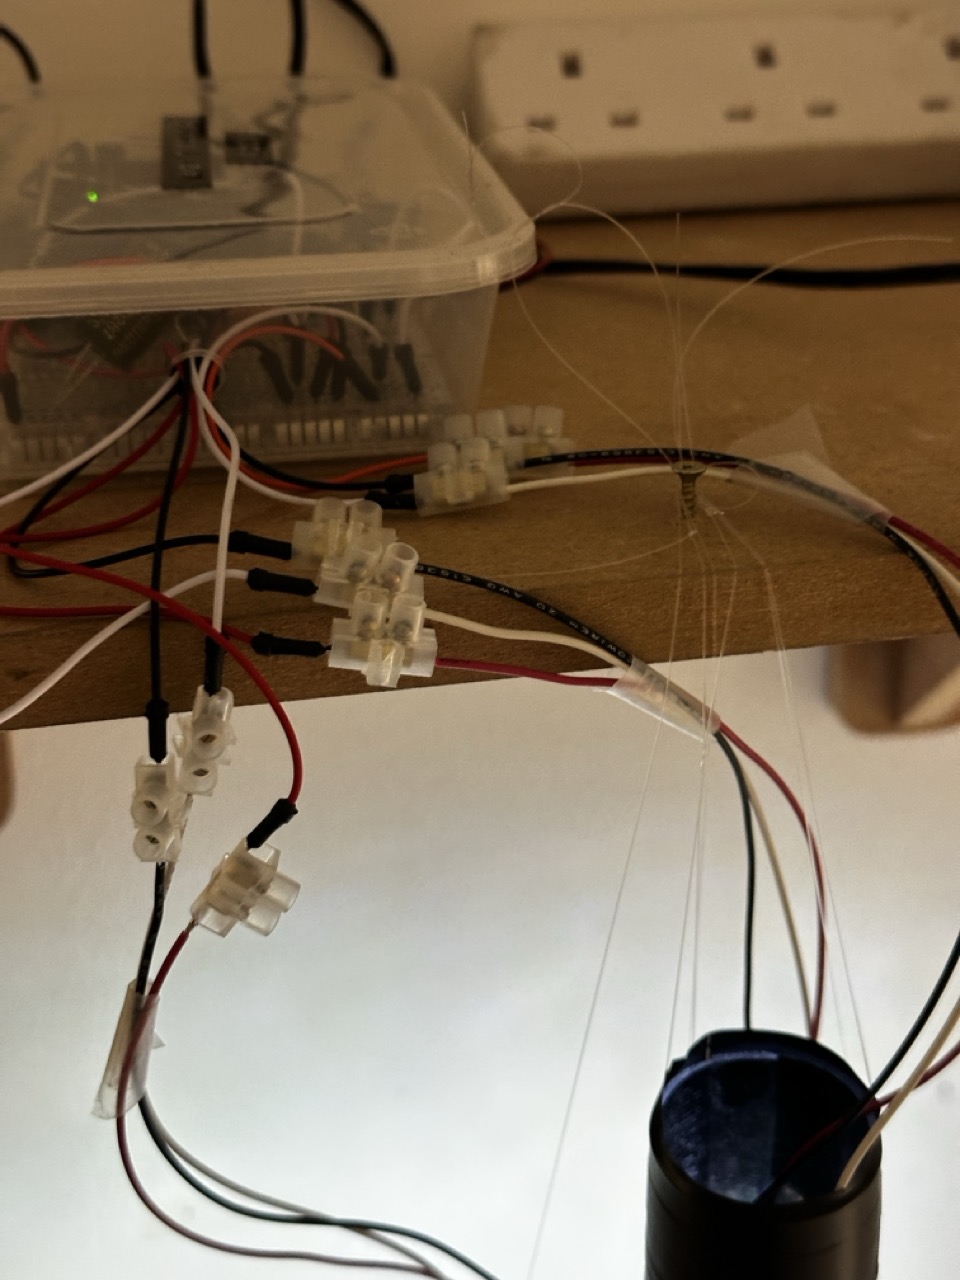
The Wiring :

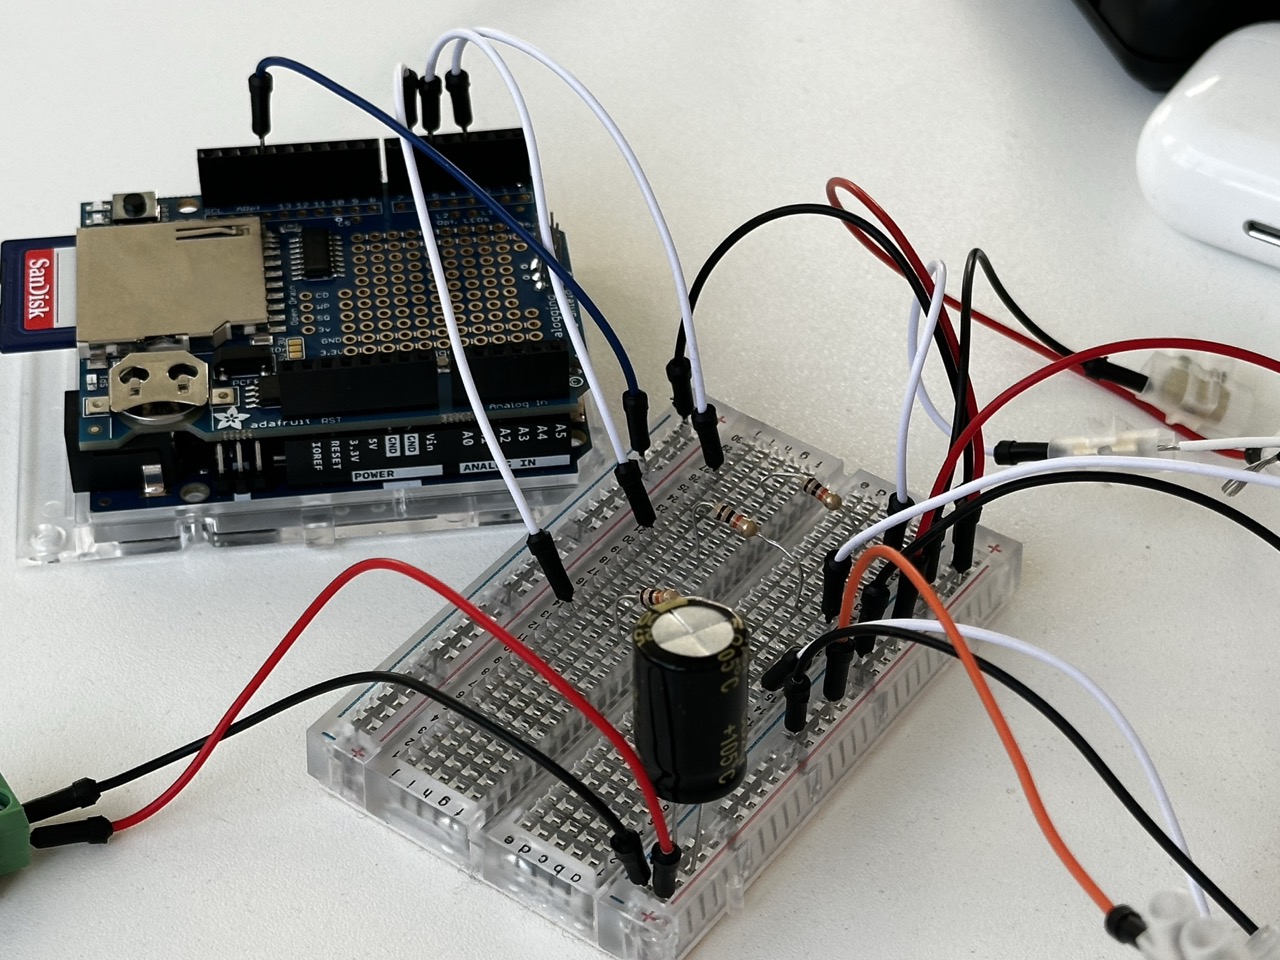

With the NeoPixels soldered and the breadboard ready the next step will to be either sorting out the housing for the electronics of the prototype and if I have time soldering the breadboard to something more solid.
The Code:
// Expressive Data
// Nicholas Mclaughlin IxD Y3

/* This Arduino sketch is to control a 3 NeoPixel set up that is driven by data from a CVS file and assign colours to the actions and when those actions took place
as outlined within the data in the CSV file "Data" */

/* /\/\/\/\/\ This here code is the product of Dr Catherine M. Weir's brilliance and within it are the messings around by Nicholas McLaughlin /\/\/\/\/\ */

// LIBRARIES ------------------------------------------
#include <SPI.h>
#include <SD.h>
#include <RTC.h>  //Unless youre using the R4 which has its own RTC built it.
#include <textparser.h>
#include <Adafruit_NeoPixel.h>

// GLOBAL VARIABLES -----------------------------------
// SD CARD
const int chipSelect = 10;  //Chip Select pin is usually 10 unless its been hacked to read otherwise, if it is a hacked sheild then change the pin select int

File csv;
String fileName = "Data.csv";  // This sketch is using the custom CSV file Data, REMEMBER - No longer than 8 characters, not including .CSV

int numRows = 0;
int sdIndex = 0;

long startPos = 0;
long pos = 0;

// RTC --------------------------------------
//RTC_PCF8523 rtc;  // This RTC (SD sheild RTC) is disabled as not to clash with the RTC included in the R4

long tHour = 0;  // Create two longs to hold the hour and minute when you want the timer to fire
long tMinute = 0;

// NEOPIXELS
const int pin1 = 3;  // What pins are running what rings
const int pin2 = 5;
const int pin3 = 6;
const int numPixels = 12;  //Number of pixels per ring

// to run the rings as one connected strip for testing/ demonstration purposes
/*
const int pin = 6;
const int numPixels = 36;

Adafruit_NeoPixel ring(numPixels, pin, NEO_RGBW + NEO_KHZ800);
*/

Adafruit_NeoPixel ring1(numPixels, pin1, NEO_RGBW + NEO_KHZ800);  // Initialising each NeoPixel ring seperatley so that they could in theory run separately
Adafruit_NeoPixel ring2(numPixels, pin2, NEO_RGBW + NEO_KHZ800);  // but for the prototype theyll be running off the same CSV data.
Adafruit_NeoPixel ring3(numPixels, pin3, NEO_RGBW + NEO_KHZ800);

// SETUP -----------------------------------------------
void setup() {

  // Serial.begin(9600);
  // while (!Serial) {};  // This is only needed if running from your laptop. REMEMBER - Take it out when the arduino is stand alone.

  // NEOPIXELS
  ring1.begin();  //calling all 3 rings
  ring2.begin();
  ring3.begin();

  ring1.clear();  // turning off all 3 of the rings
  ring2.clear();
  ring3.clear();

  ring1.setBrightness(255);  // remember to change this prototyping brightness
  ring2.setBrightness(255);  // 0-255 brightness
  ring3.setBrightness(255);

  for (int i = 0; i < numPixels; i++) {
    ring1.setPixelColor(i, ring1.Color(0, 0, 0, 255));
    ring2.setPixelColor(i, ring2.Color(0, 0, 0, 255));
    ring3.setPixelColor(i, ring3.Color(0, 0, 0, 255));
  }

  ring1.show();
  ring2.show();
  ring3.show();

  // RTC
  //Again this is all removed as it was clashing with the R4 RTC
  /*if (!rtc.begin()) {                                      // Initialise the Real Time Clock
    Serial.println("Couldn't find the Real Time Clock.");  // If the clock does not start, print an error and put the Arduino to 'sleep'
    while (1) {};
  }

  Serial.println("Real Time Clock is running.");  // If the clock starts successfully print a confirmation

  rtc.adjust(DateTime(F(__DATE__), F(__TIME__)));  // Update the RTC's time from your computer's clock
*/

  if (!RTC.begin()) {
    Serial.println("Couldn't start the RTC.");
    while (1) {};
  }

  Serial.println("Clock started.");
  RTCTime timeToSet = currentRTCTime();
  RTC.setTime(timeToSet);

  // SD CARD

  //Cheching for the SD card, reading it, checking that the correct file is actully there and then using the data found on the CSV file.
  //REMEMBER - Double check the CSV file is actully correct
  //REMEMBER - No commas in the CSV file!

  Serial.println("Starting SD Card...");

  if (!SD.begin(chipSelect)) {
    Serial.println("Something's gone wrong! Maybe check your Chip Select Pin and that the SD Card is properly inserted?");
    while (1) {};
  }

  Serial.println("SD Card Ready!");

  if (!SD.exists(fileName)) {
    Serial.println("File is missing.");
    while (1) {};
  }

  Serial.println("File found!");

  csv = SD.open(fileName);

  startPos = findStartPos();  // Find the position in the file that marks the end of the header line
  Serial.print("Start Pos: ");
  Serial.println(startPos);

  while (csv.available()) {
    csv.readStringUntil('\n');
    numRows++;
  }

  Serial.print(numRows);
  Serial.println(" rows in file.");

  csv.seek(startPos);     // Go back to the start of the file
  pos = findStartTime();  // Find the real time start position - see code on findStartTime tab
  Serial.print("New Start Pos: ");
  Serial.println(pos);

  csv.close();
}

// LOOP ------------------------------------------------
void loop() {

  //DateTime now = rtc.now();  // Get the current time from the RTC
  /* NOTE: It is not a good idea to try and print this to the Serial every time you go through the loop - it will clog your Serial port! */

  RTCTime now;
  RTC.getTime(now);

  if (now.getHour() == tHour && now.getMinutes() == tMinute) {  // Check if the current time matches the target time

    // READ IN THE CSV DATA
    csv = SD.open(fileName);
    csv.seek(pos);

    String temp = csv.readStringUntil('\n');
    int l = temp.length() + 1;
    char currentRow[l];
    temp.toCharArray(currentRow, l);
    Serial.println(currentRow);
    pos = csv.position();

    csv.close();

    TextParser parser(","); //if youve forgot to actully take out the commas
    // CREATE VARIABLES TO HOLD THE DATA YOU WANT TO EXTRACT FROM THE CSV FILE HERE, ENSURING THE DATA TYPE MATCHES WHAT IS IN YOUR CSV FILE

    char time[6];
    char entry[193];
    char activity[10];
    char next[6];
    long nextMillis;

    parser.parseLine(currentRow, time, entry, activity, next, nextMillis);  // PASS YOUR VARIABLES INTO THE TEXT PARSER IN THE ORDER THEY APPEAR IN YOUR CSV FILE

    tHour = findHour(next);  // Update thour and tMinute to control when data is next read from the SD Card
    tMinute = findHour(next);

    // Print your data to the Serial
    Serial.print("Time ");
    Serial.println(time);
    Serial.print("Entry: ");
    Serial.println(entry);
    Serial.print("Activity: ");
    Serial.println(activity);
    Serial.print("Next: ");
    Serial.println(next);
    Serial.print("Next Millis: ");
    Serial.println(nextMillis);

    sdIndex++;
    Serial.print("Index: ");
    Serial.println(sdIndex);
    Serial.println();

    if (sdIndex >= numRows) {
      pos = startPos;
      sdIndex = 0;
    }

    // NEOPIXELS
    updateNeoPixels(time, activity);
  }
}

// Any supporting code and files are available on request. 
Test Tube :
At this point I had already put the NeoPixels into the tubes and basically wired everything up so to test things out I had made another tube with its only job to test things out on and not ruin the other ones. Through testing I had decided that with the tools I had in my disposal I couldn’t get the clean cut that I had imagined so decided not to cut the prototype tubes.
Also I had used this ‘test tube’ to figure out how I would attach them to the ceiling, the best way being fishing wire and a sewing needle to get through the tough rubber that seemed to close up no matter what i used to cut the holes.
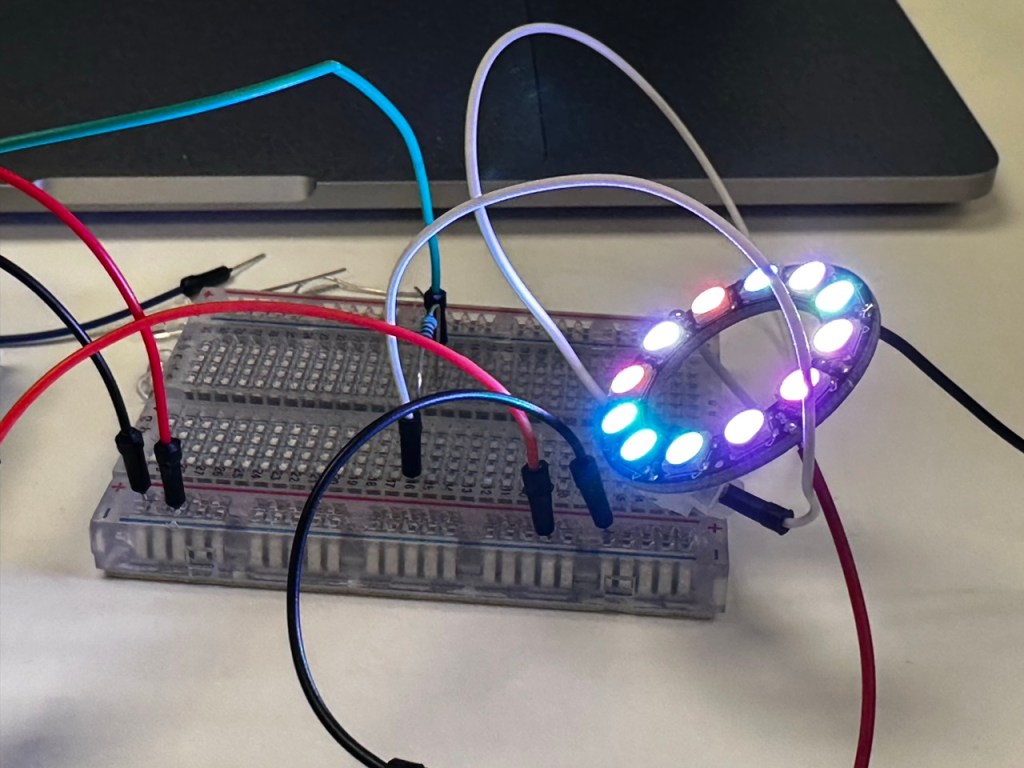
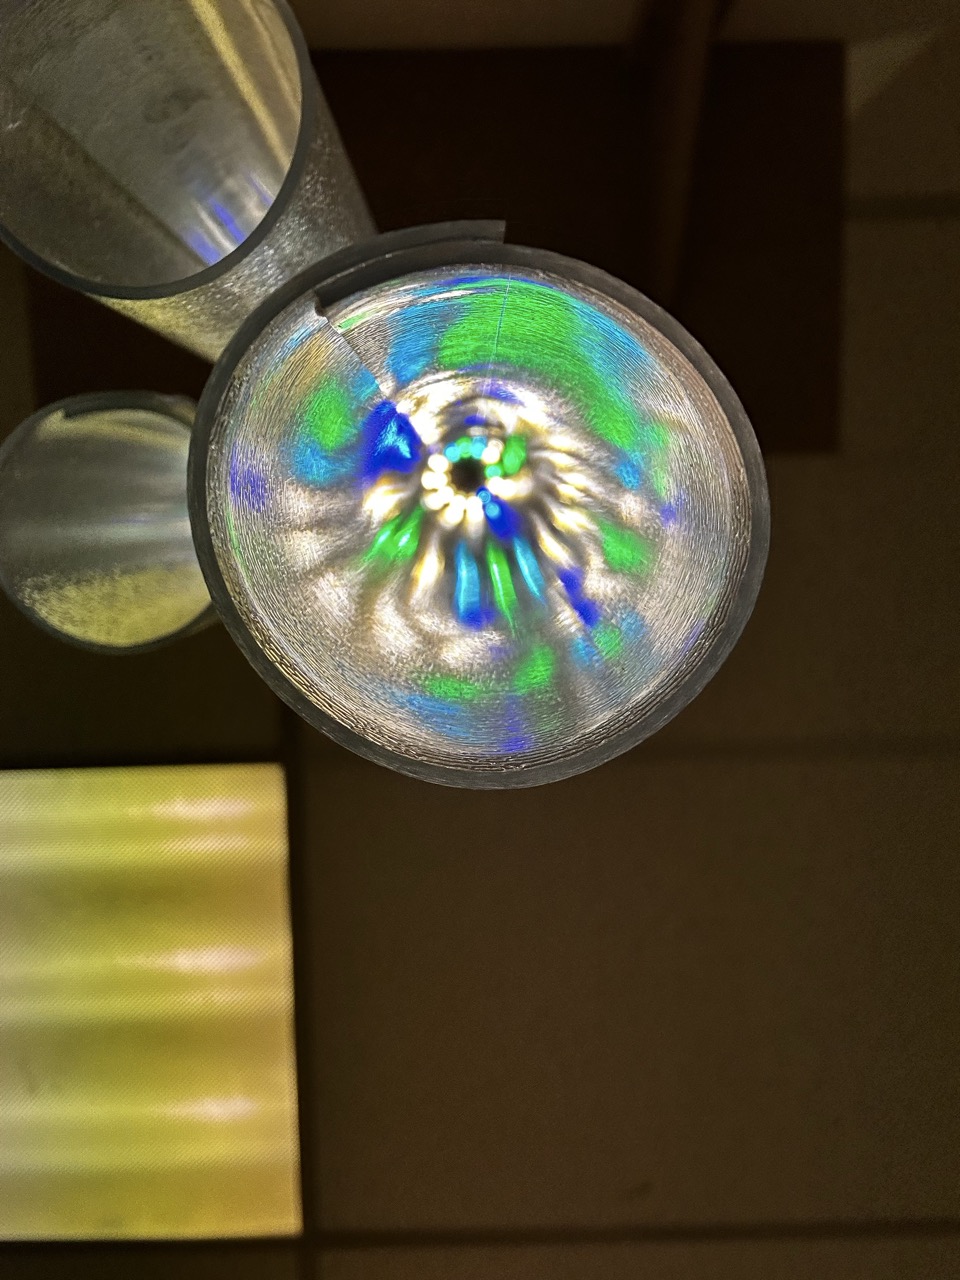
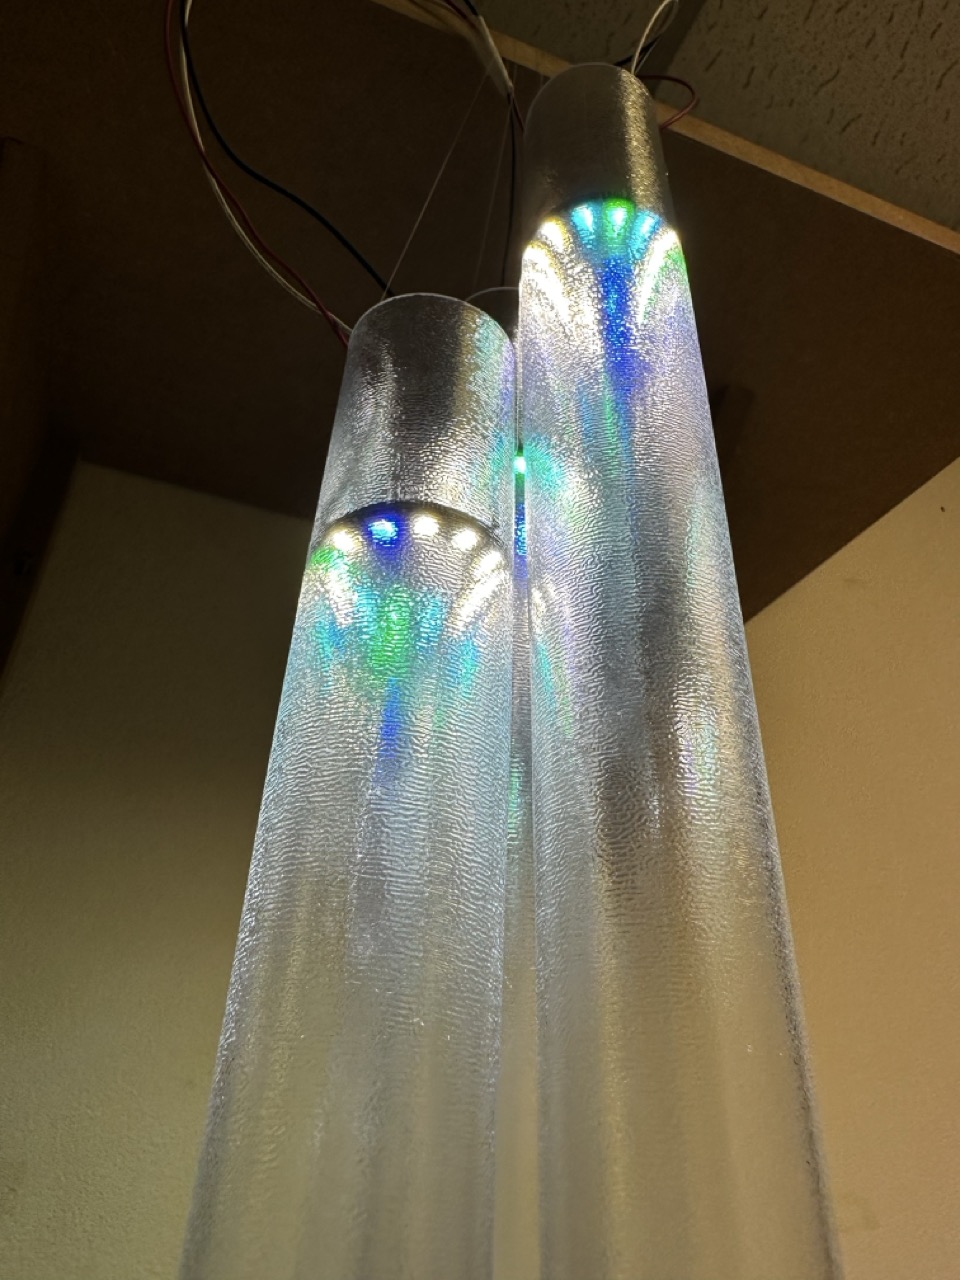
Testing the Colours :

Up until this point I had not properly considered the colours but during the coding of the Arduino I had the opportunity to both give it more thought and elaborate on it a bit more.
After testing a few colours I thought it would be interesting to assign different colours to different activities but have them all harmonise together. As I had green already programmed into the NeoPixels to indicate activity I thought moving across the colour wheel to use blue to indicate rest and then further round to use purple to indicate travel and keep non logged time as the NeoPixels standard natural white.
| Green | Activity |
| Blue | Leisure |
| Purple | Travel/ Preparation |
Very sophistication housing :
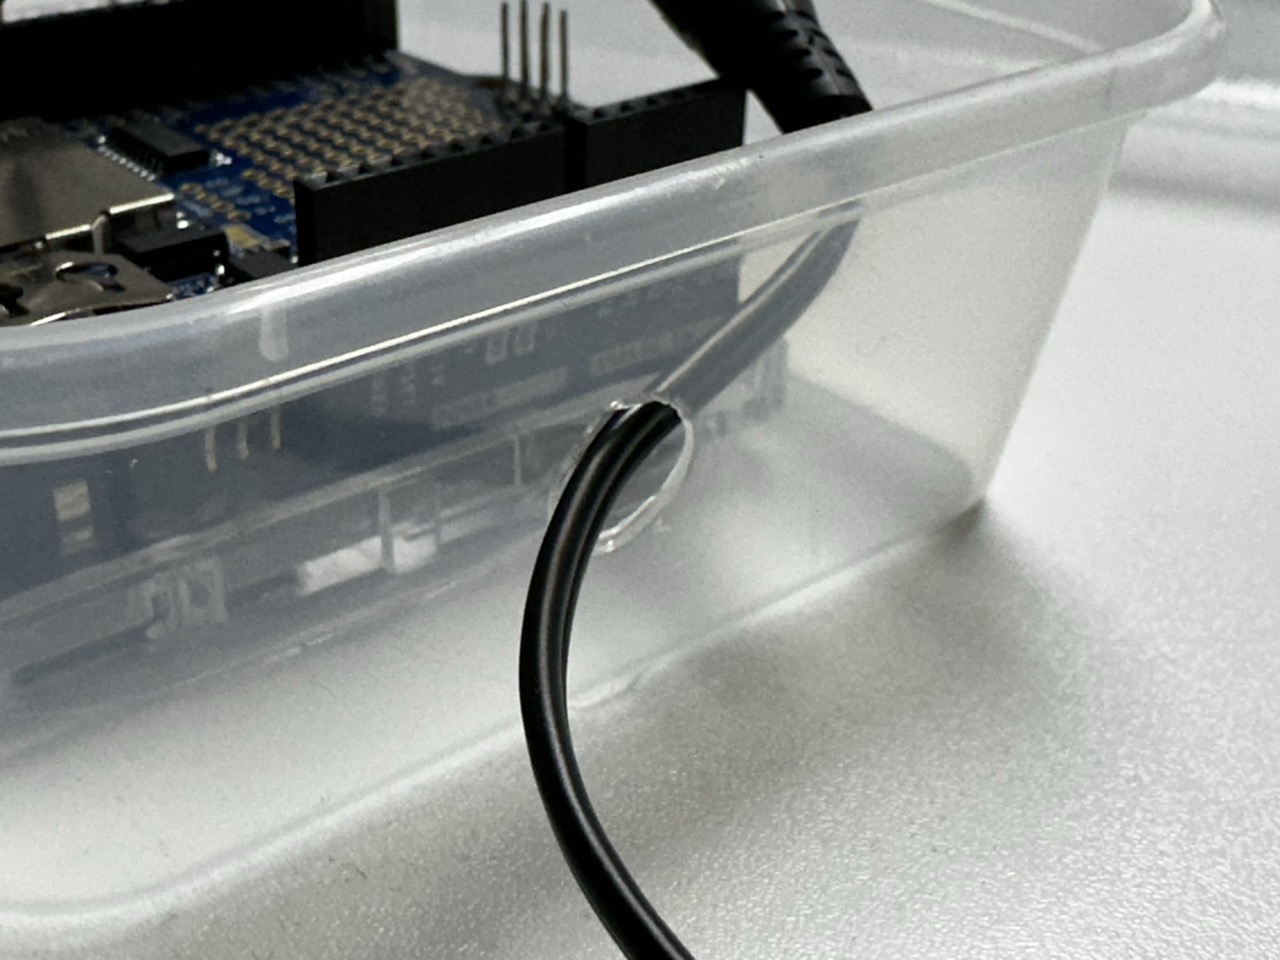
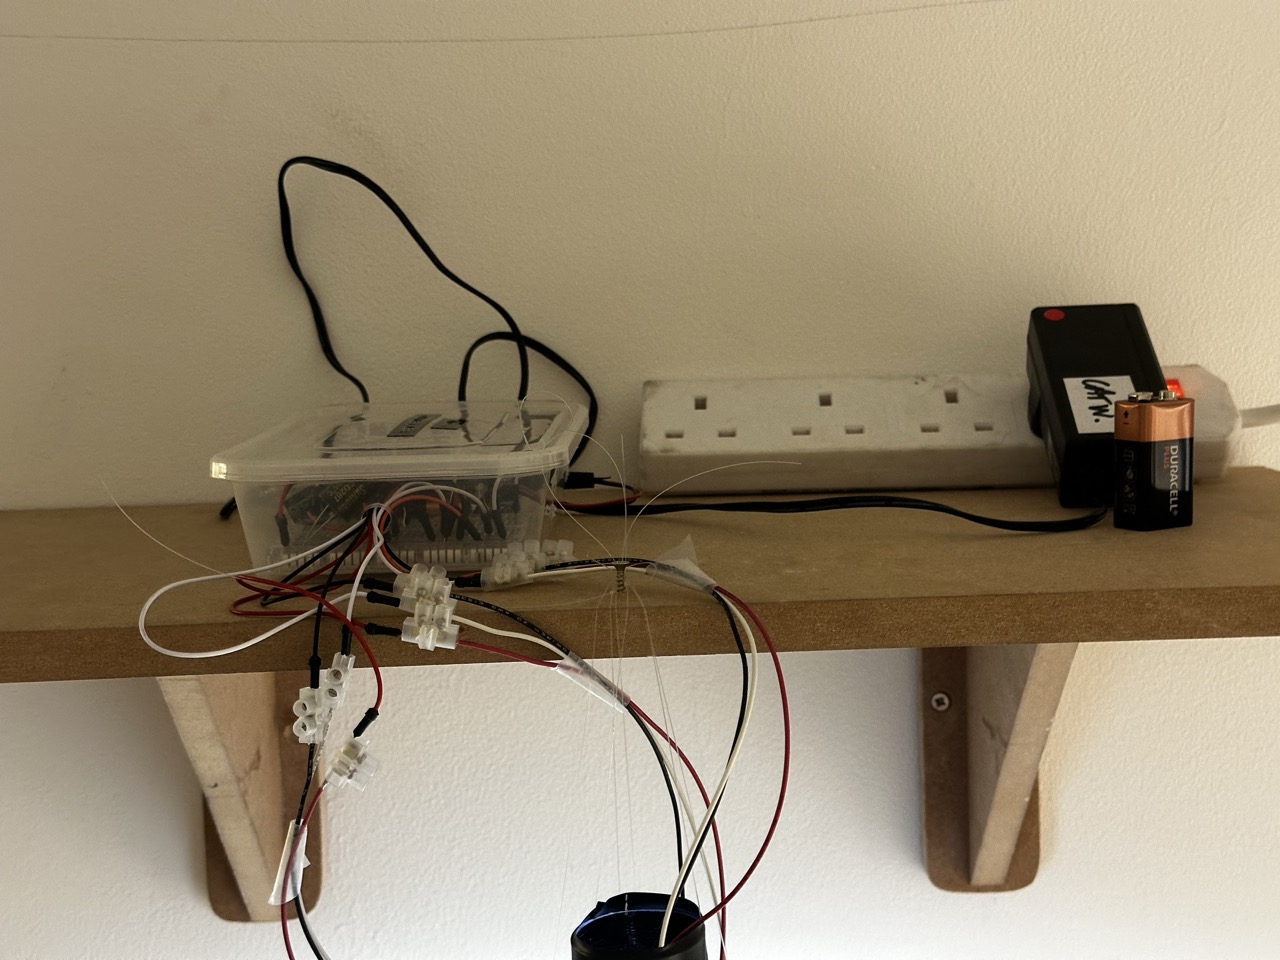
As the housing for the Arduino, bread board and battery ideally wont be seen by anyone then I didn’t want to spend too much time on it, initially I had ideals of building a bespoke box for it but a modified Tupperware container does the same job in a fraction of the time.
Thanks to Tom for supplying said container.
The Wind Chimes :
The wind chimes are hanging, not from the ceiling as I might have hoped but from a shelf that still hides a multitude of sins and hold the housing for the arduino.

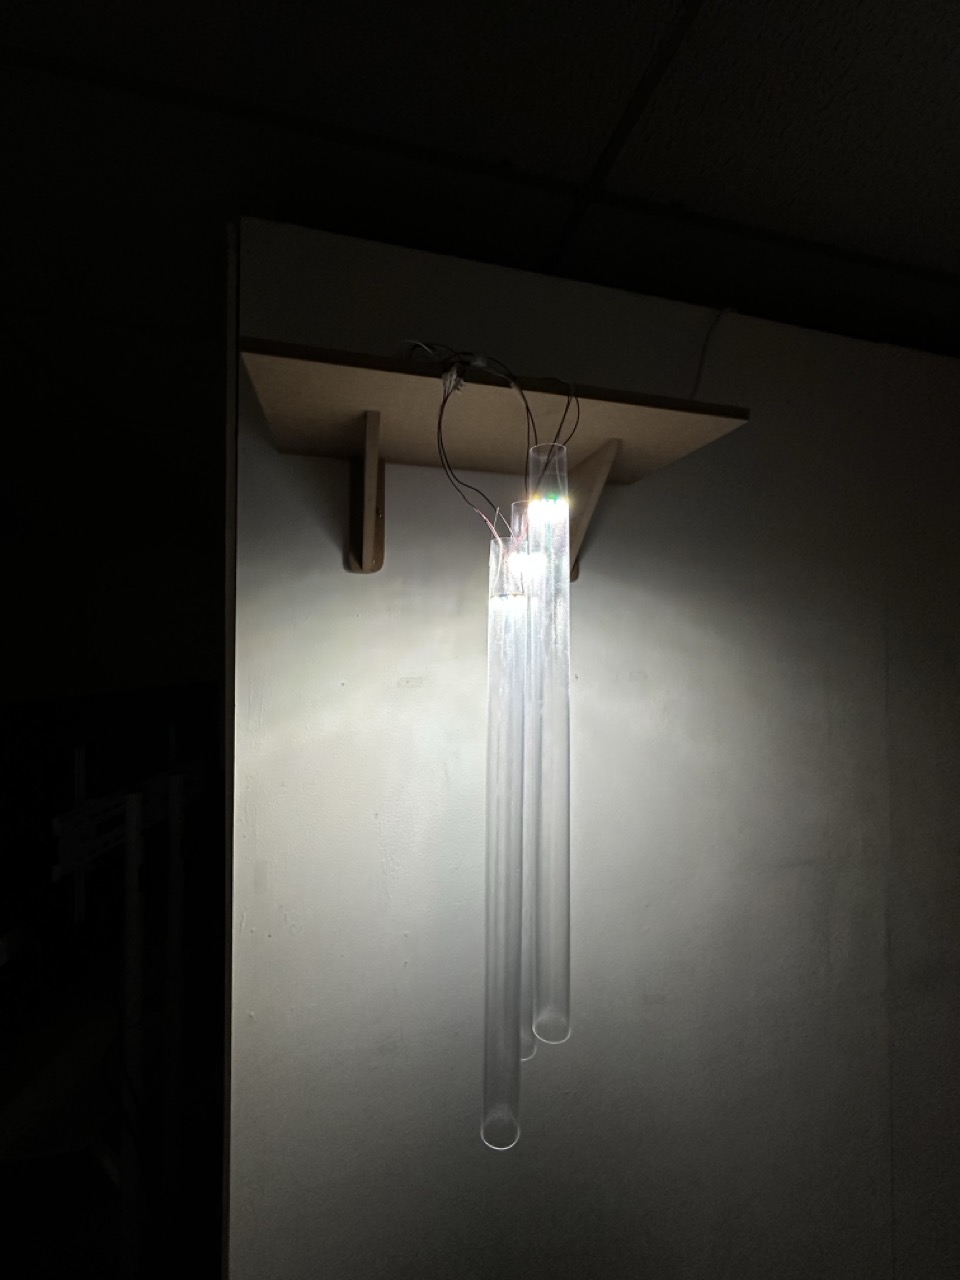

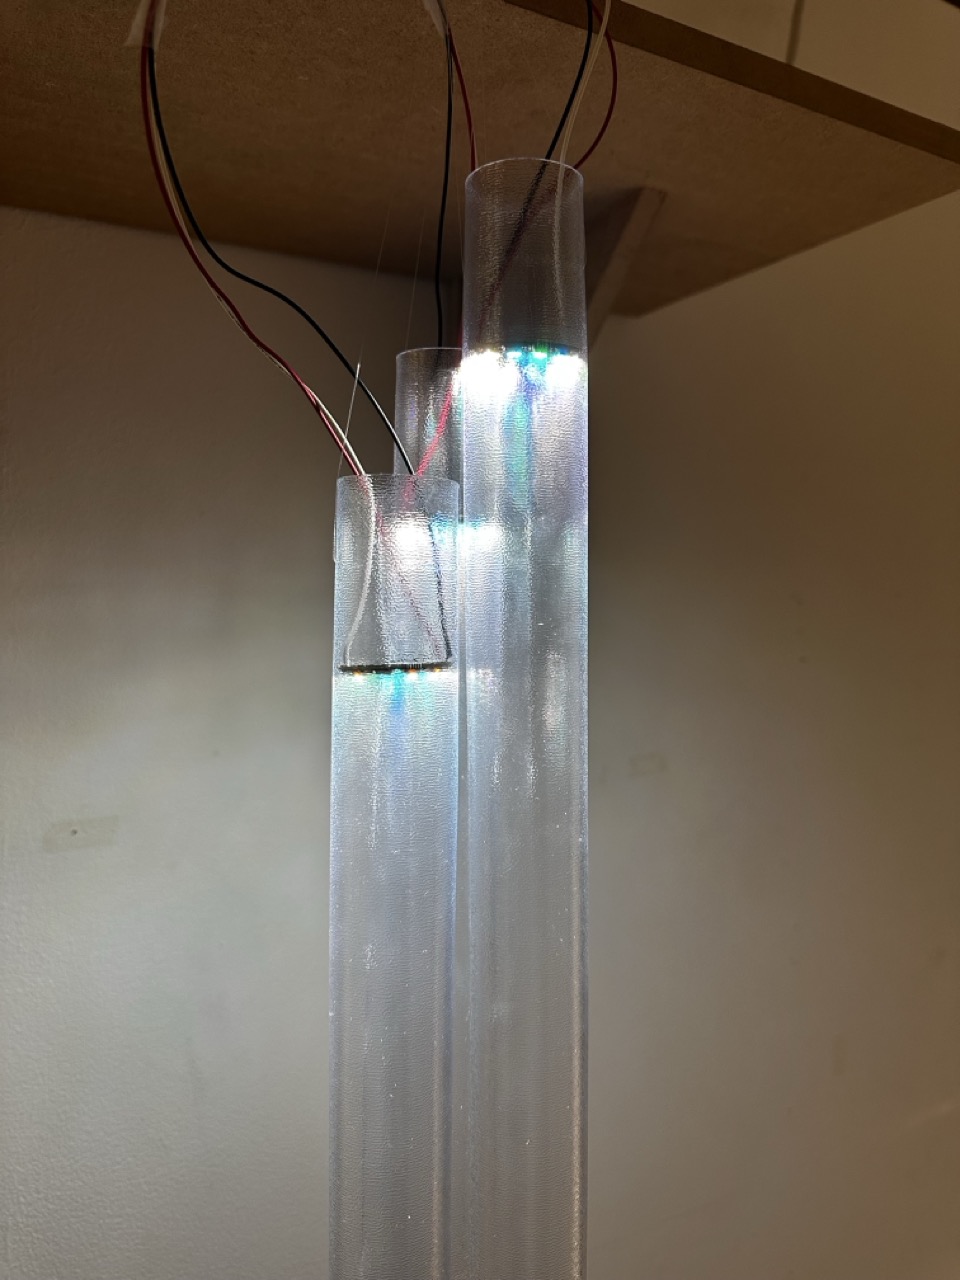
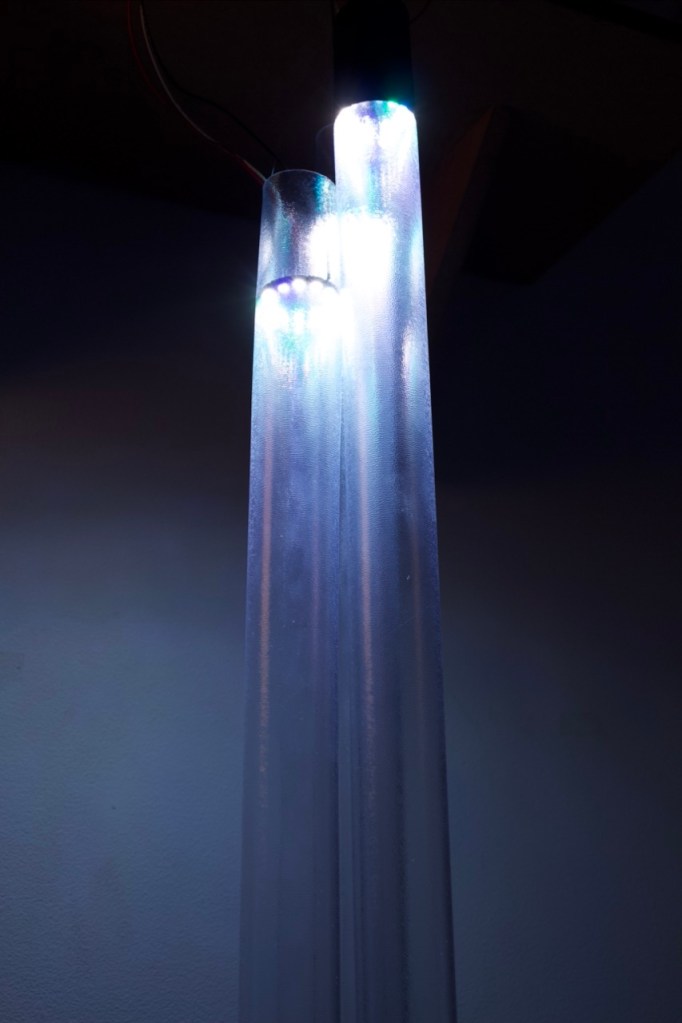
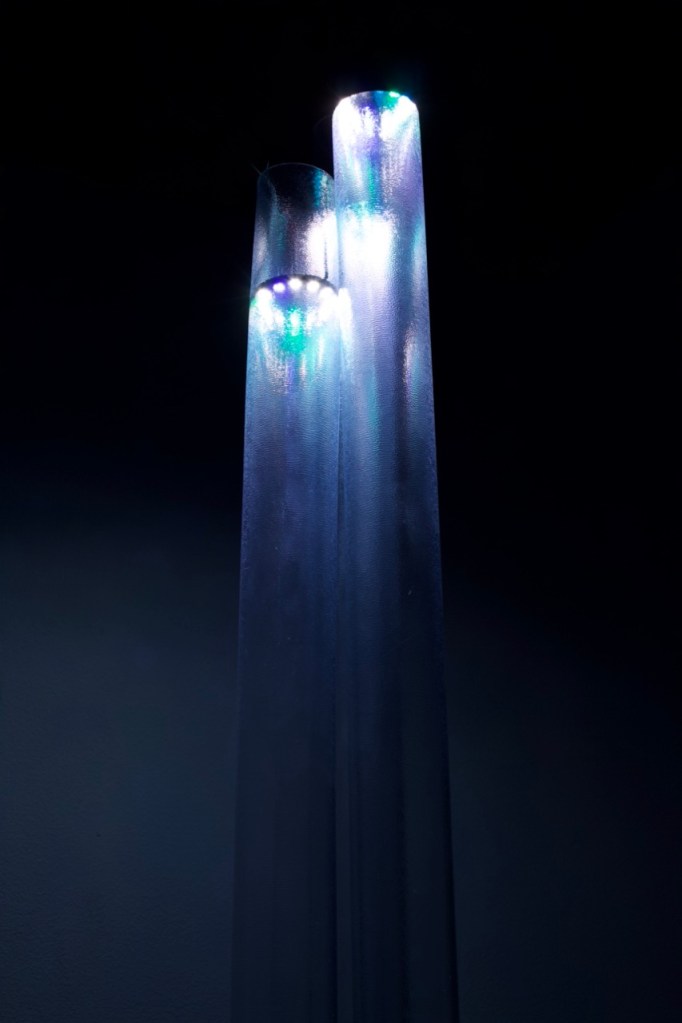
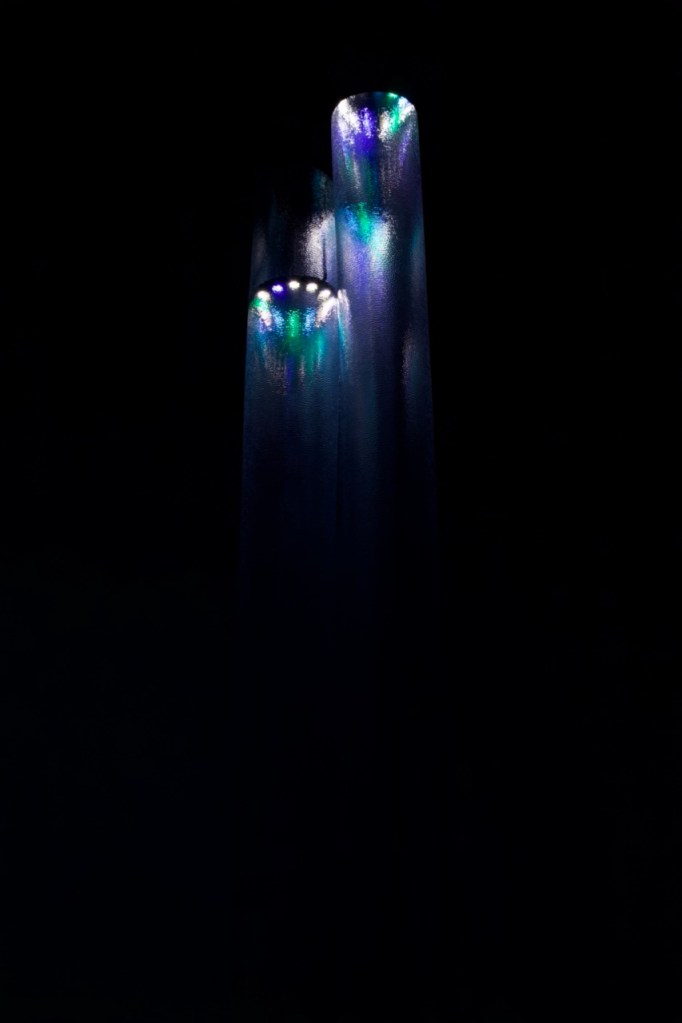
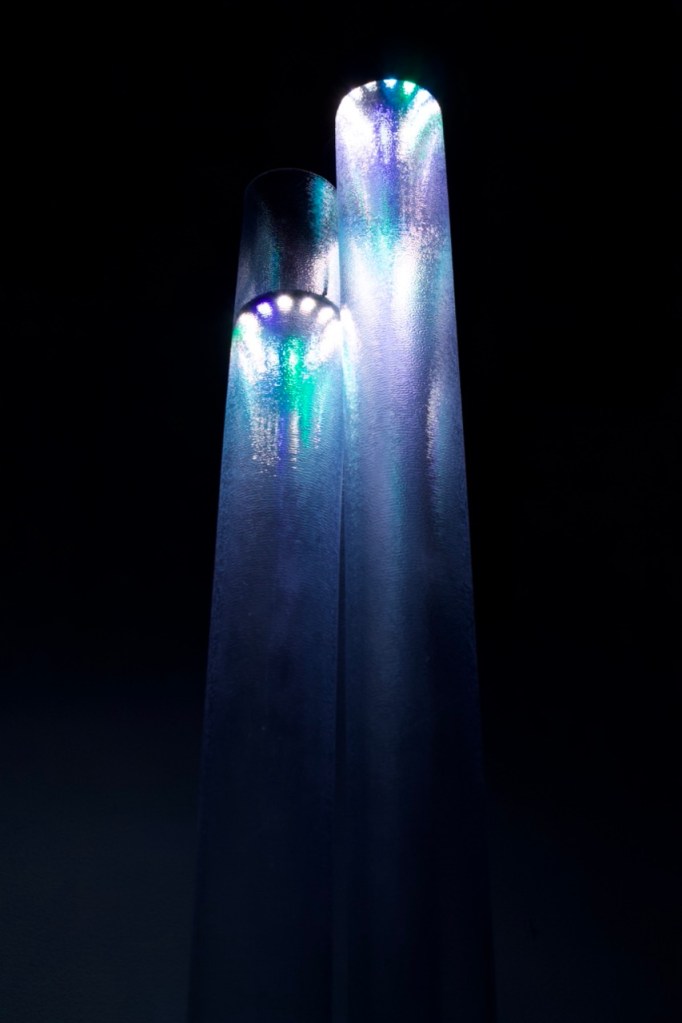
Final Prototype :


“We are each our own worst critic” – Ellen Hendriksen
I have a tendency to see the flaws in my work but I am quite happy with how this turned out and believe that it has some real potential to go further to become something quite beautiful and quite interesting.
Maybe at some point in the future it will be.
Documentation :
I want to revisit it if I have time.
Plan out the shots better, better quality camera, slicker production.
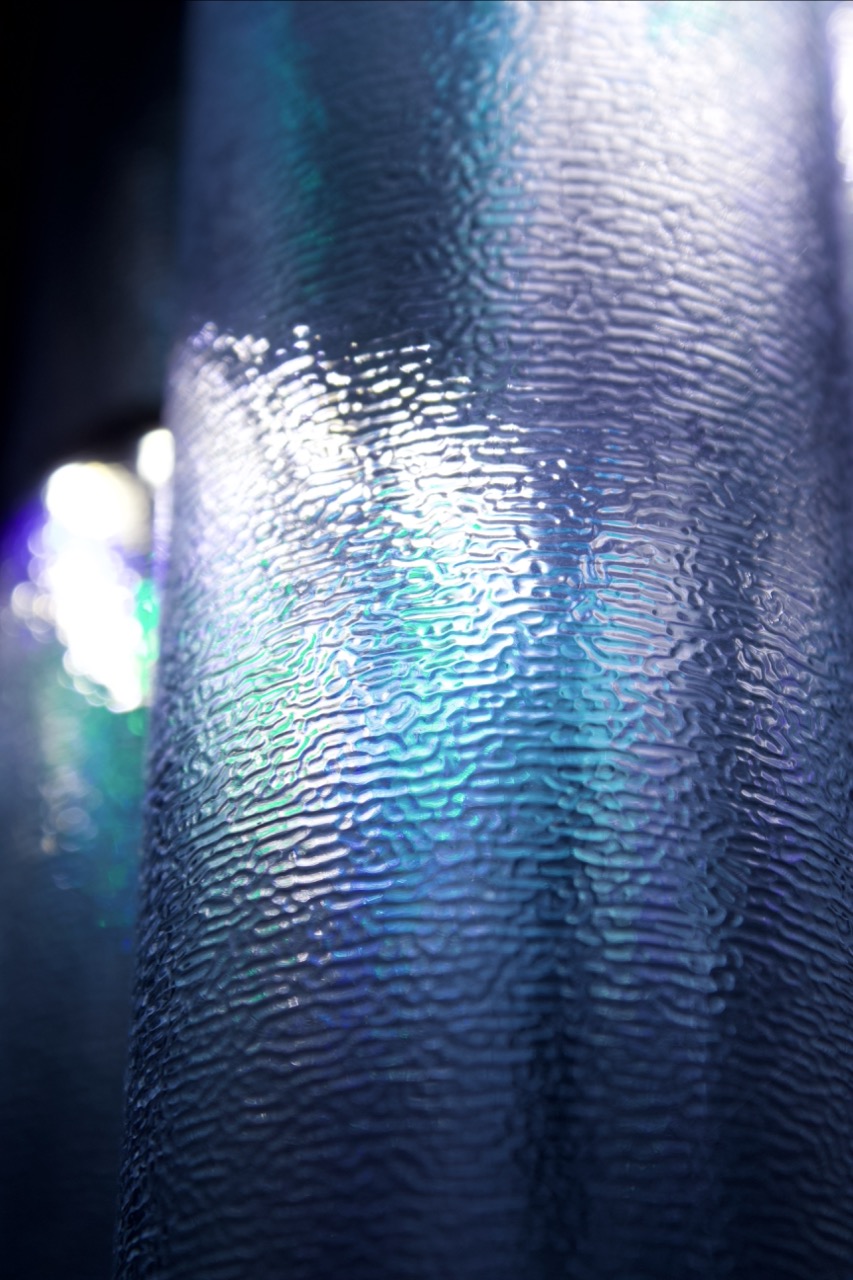
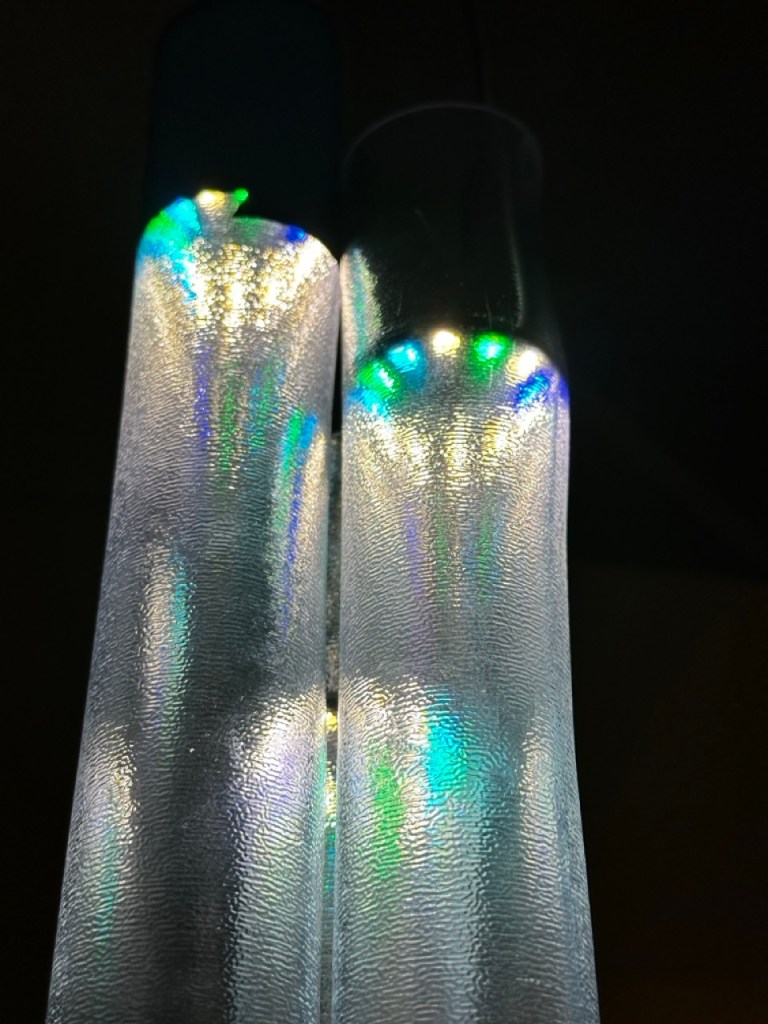
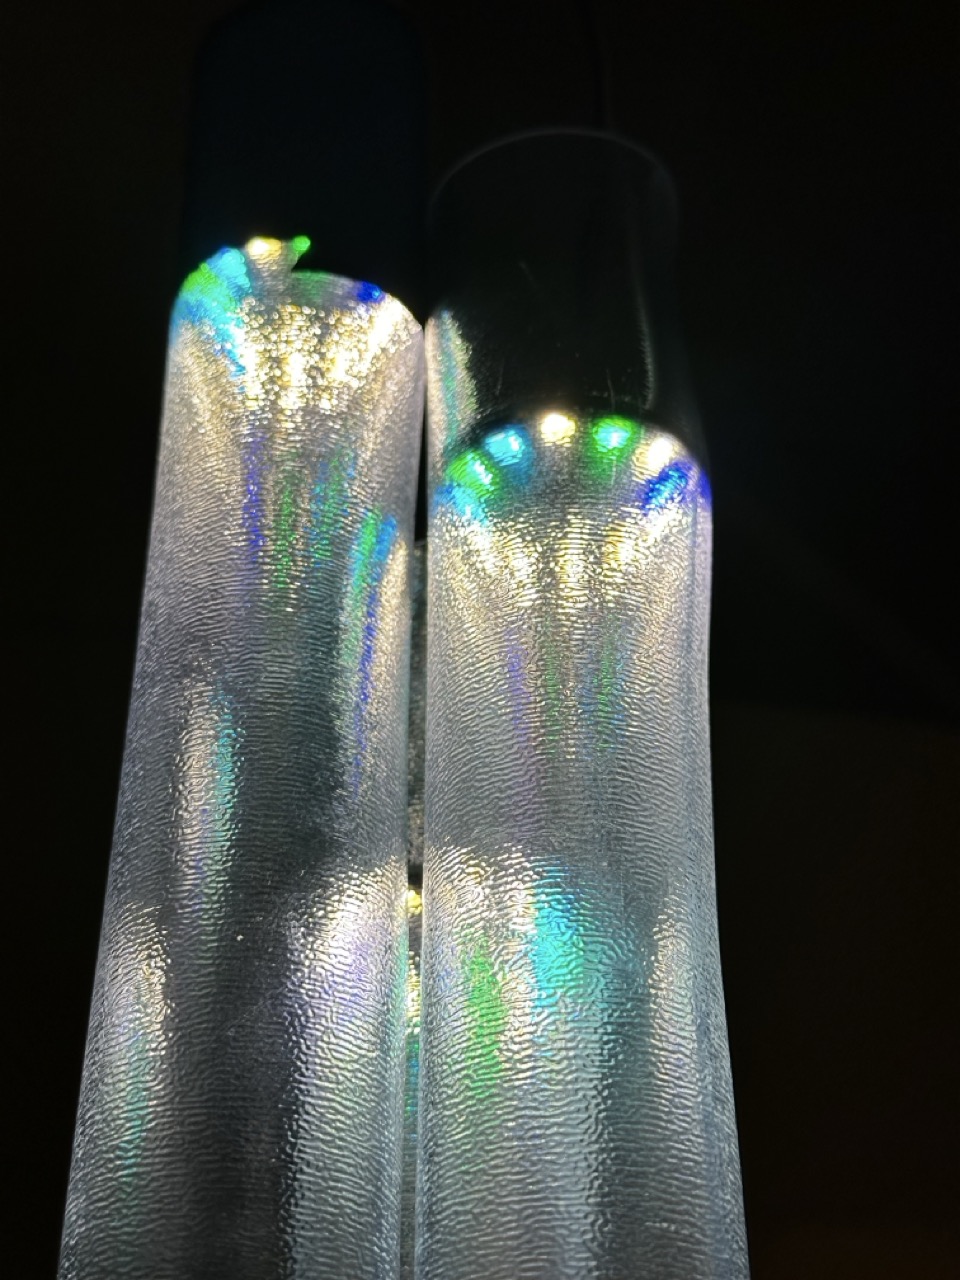
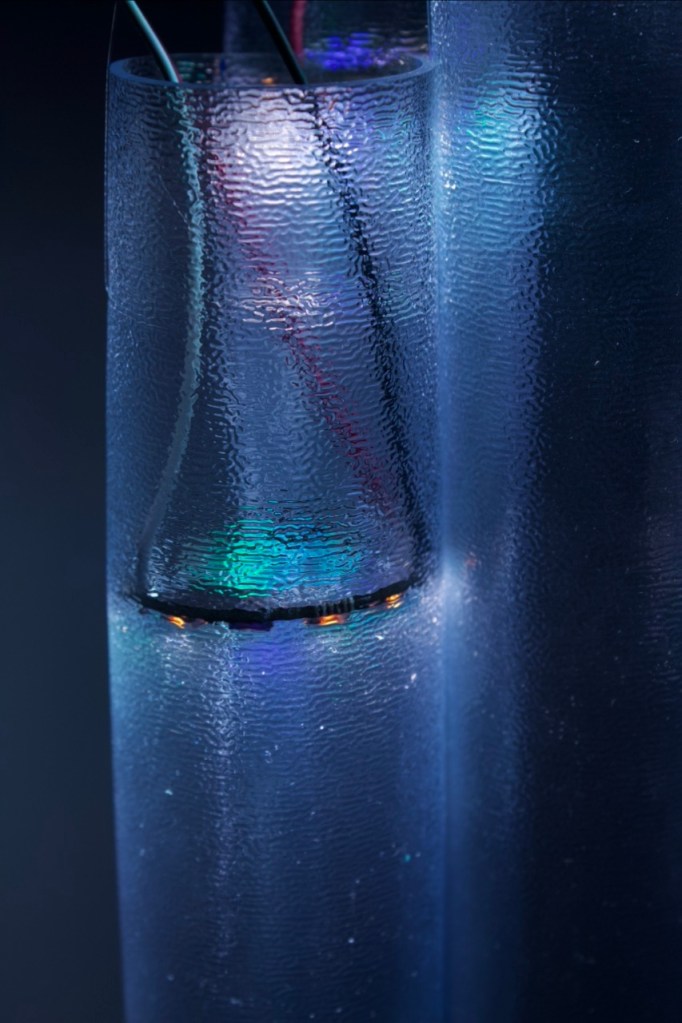
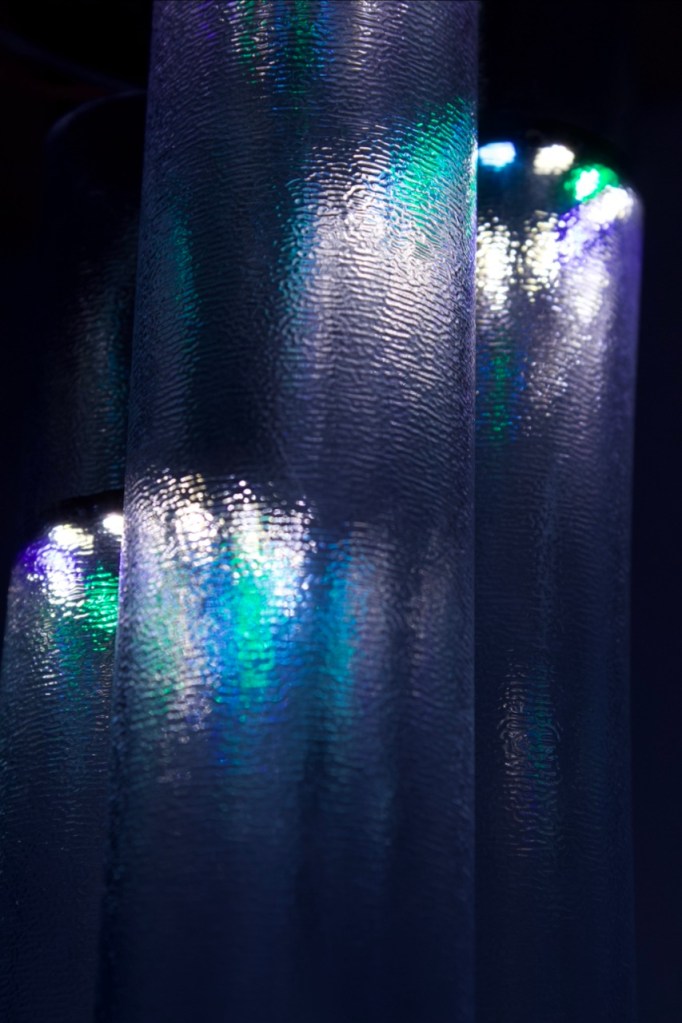
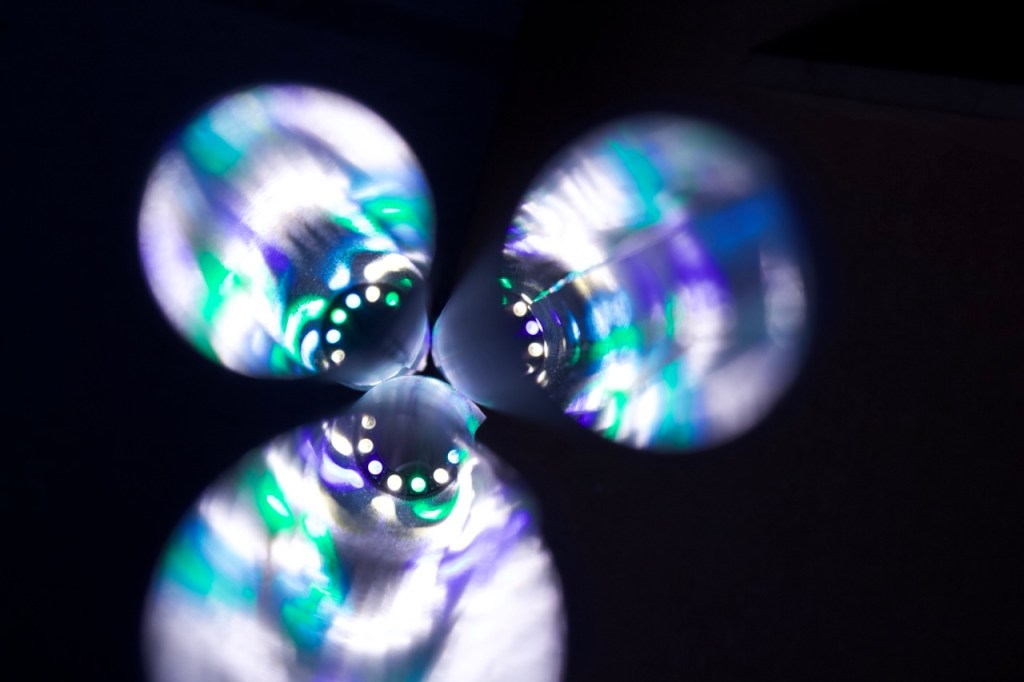
As the shades are these long slim tubes with the textured rubber, I wanted to use a 9:16 ratio and close up shots to explore the texture and light of the prototype and imitate how some people got very close to the light as well as under it to inspect it further.
Taking it further :
I want to make a mock up of the final idea here, either an illustration or a 3D render.
As outlined in my initial concepts designs, if this prototype was to be taken further then there would be a few things to expand as well as improve :
- First thing to change would be the scale. As seen the prototype is just 3 shades but if it was to be taken further then I would increase the scale and have a large two level chandelier that would show the relationships between people in each data set with each shade expressing the data of one person each.
- The power behind it. As this project would become much bigger then the technology would need to follow that with a specific rig built for it to store the data of the CVS file, power and run each NeoPixel and receive data if it is in fact live data being fed into the lights.
- The Materials of the whole thing. On a bigger scale with many different shades there will need to be a metal structure or something string enough and light enough to hold the lights in the air. As well as the structure I would like to revisit the shade materials and have them specially made as to cloud the light of the NeoPixels enough to give it the desired effect but still be light enough to be able to hang a large number of them from one structure.
Evaluation :
For this project I wanted to keep it simple and I think I did that.
I wanted to keep the concept simple for a number of reasons, firstly I wanted the final product to not just be interesting and driven by the data but to have the potential to be beautiful as well as modular.
If I had more time or to do it again I would like to give more time to the materials of the final piece and find the perfect one to both allow for the lights/ the data to be seen but also to create a sleek, clean silhouette with an almost sculptural element.
My main take away on this is that my coding skills need to be taken up a notch to match where I am in other aspects. I’ll have to allocate time to getting back into it and taking it further with examples and self driven lessons and projects instead of waiting for the brief to force me to.
Extra Documentation :


Leave a reply to Week 0.5, Week 1 and Week 2 (22/09/25 – 12/10/25) – Nicholas McLaughlin Blog Cancel reply